Gravio HubKit External Integration Guide
Table of Contents
- Webhook Integration
- MQTT Subscriber Integration
- Gorilla IVAR Integration
- i-PRO Integration
Webhook Integration
Gravio provides functionality to integrate with various external systems. Here, we’ll explain how to receive messages from devices using Webhooks.
Webhook Setup Procedure
-
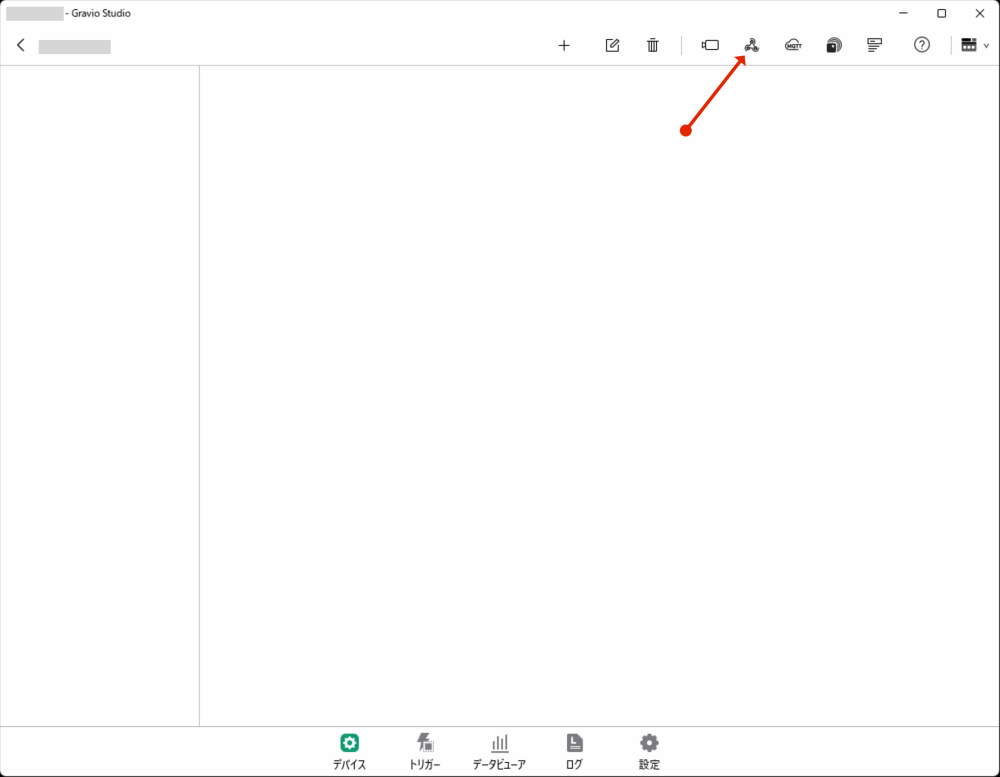
Click the “Webhook” button to display the settings panel.
-
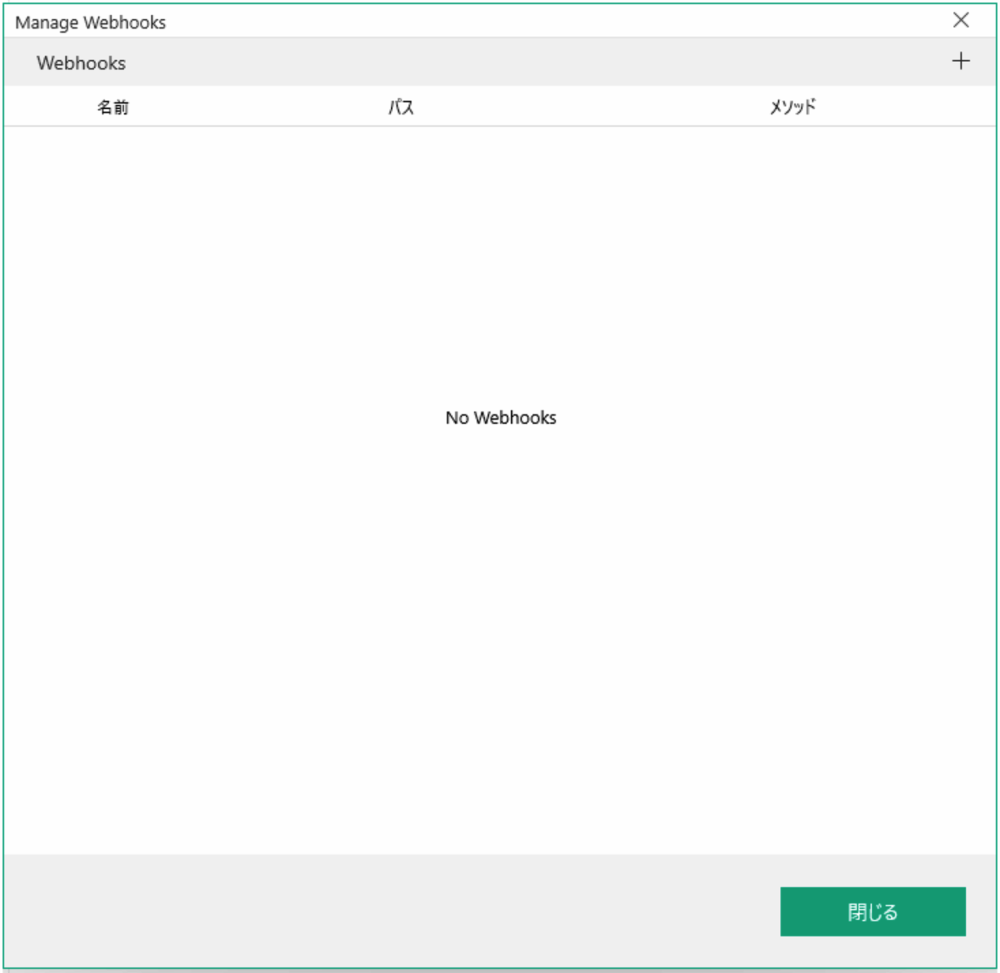
Register the Webhook URL in the settings panel.
-
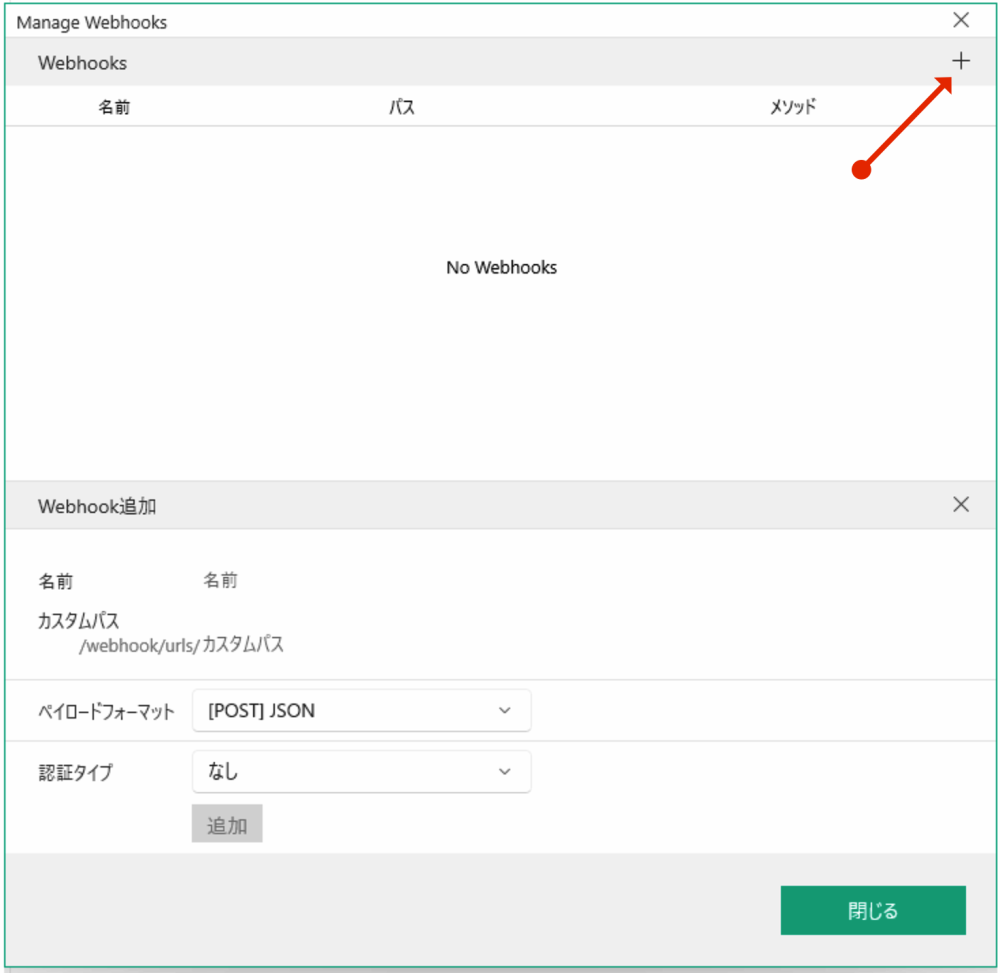
Click the “+” button to display the registration panel.
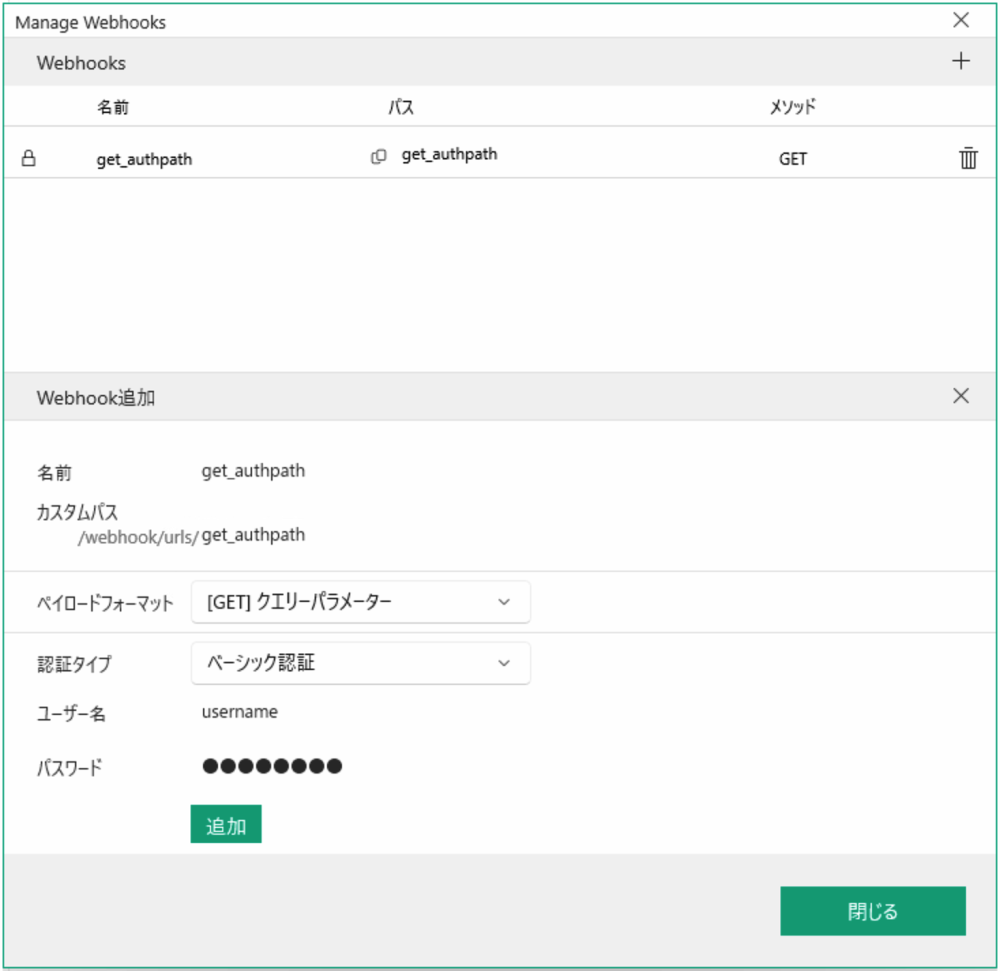
- Enter and save the Webhook information:
- Name: Identifier for the Webhook
- Custom Path: Alphanumeric characters (8 or more) after “/webhook/urls/”
- Payload Format: Select GET/POST
- Authentication Type: None or BASIC authentication
- For BASIC authentication, set username (4+ alphanumeric characters) and password (8+ alphanumeric characters)
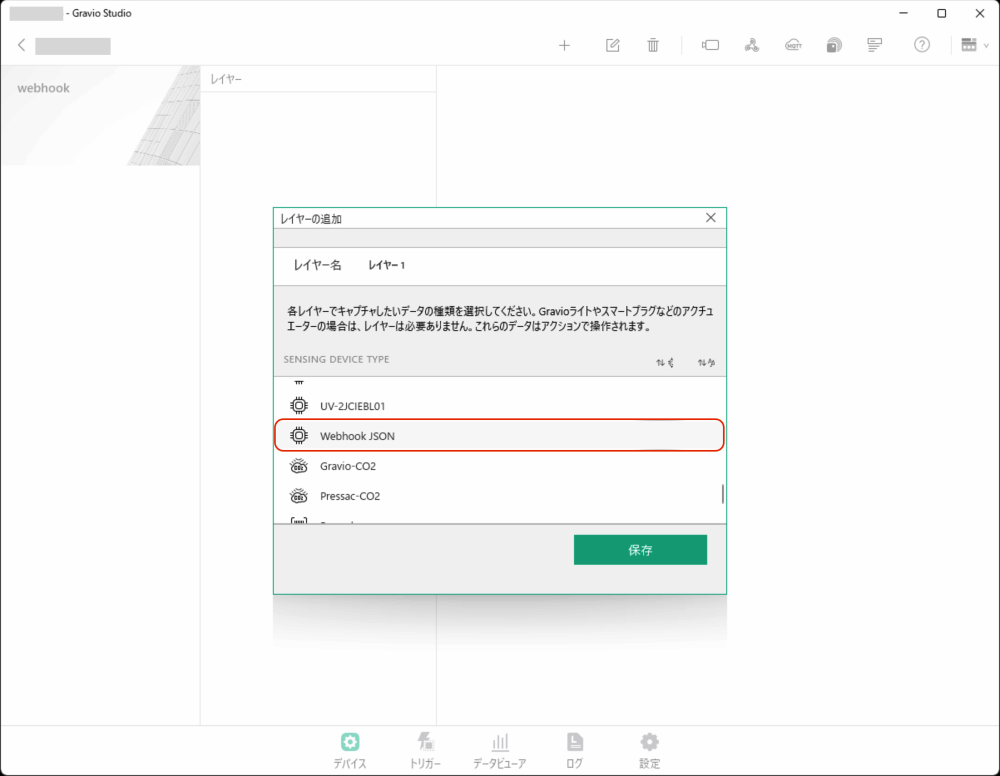
- Create a layer to record Webhook reception as data:
- Add a Webhook JSON layer to the area you’re creating.
- Bind the Webhook logical device to the created layer:
- Add the Webhook created in the registration panel.
- Enable the added Webhook.
Using Webhooks
Once the Webhook is enabled, you can receive messages from external devices. Received messages can be viewed in the data viewer. You can also set up actions triggered by received messages.
MQTT Subscriber Integration
Gravio also supports MQTT subscribers. It receives messages sent by MQTT publishers through an MQTT broker by specifying topics.
MQTT Subscriber Setup Procedure
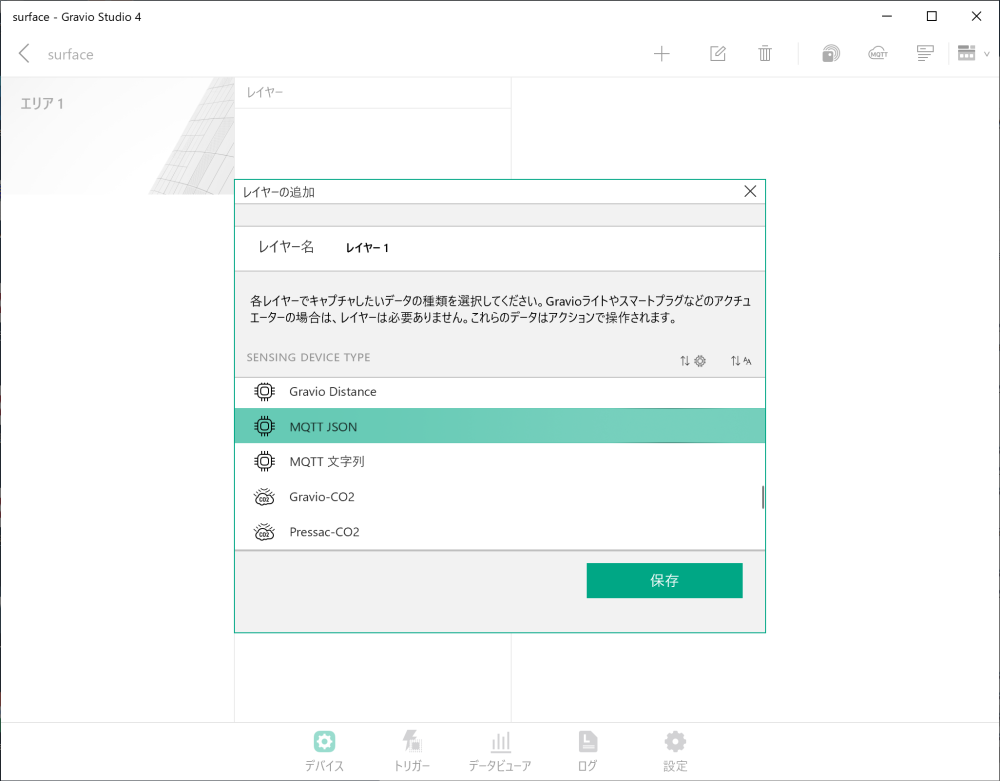
- In “Devices,” select the MQTT type (DataKind) to add a new area and layer.
- For MQTT subscribers, choose whether the received data format is JSON or string.
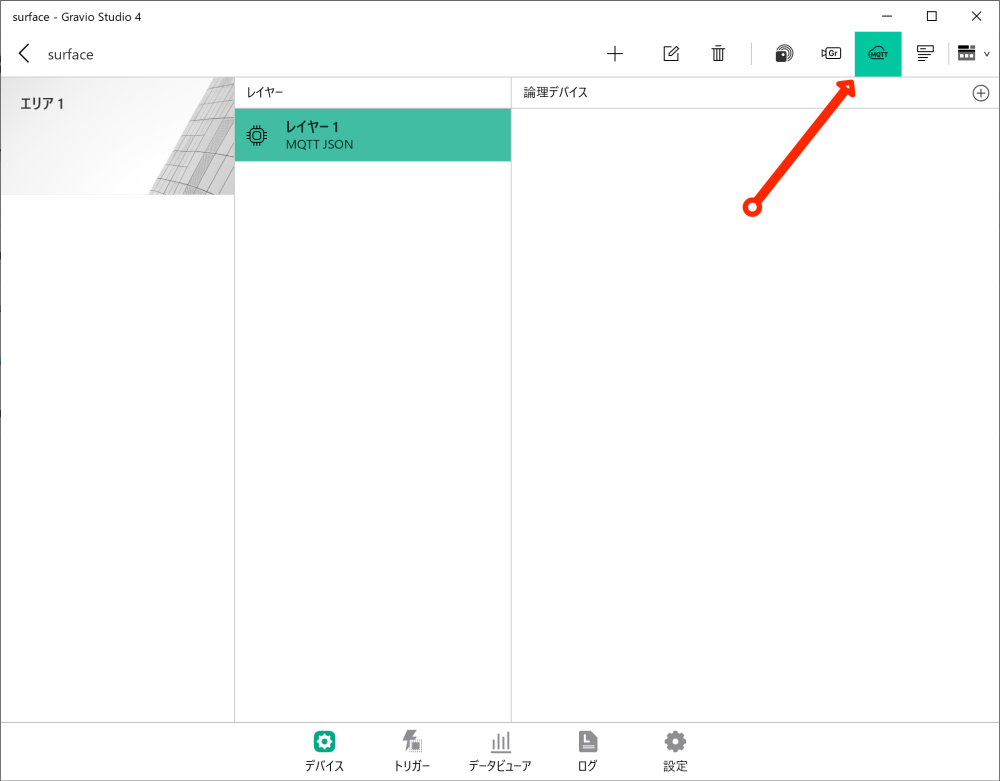
-
Click the settings button to display the MQTT subscriber and broker settings screen.
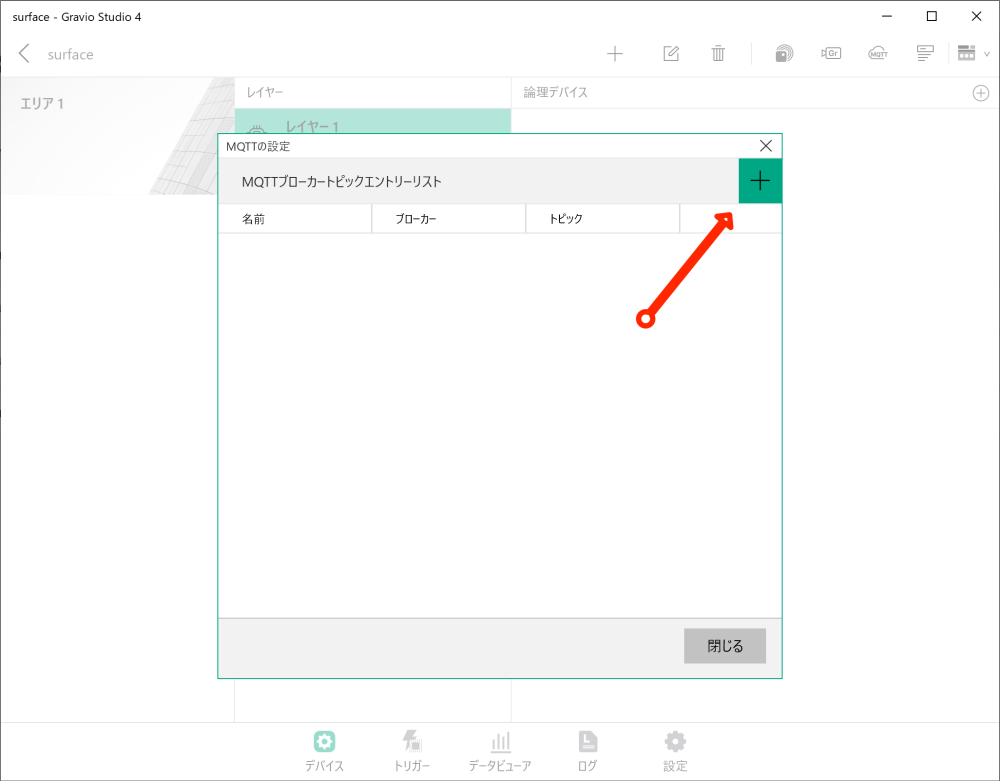
-
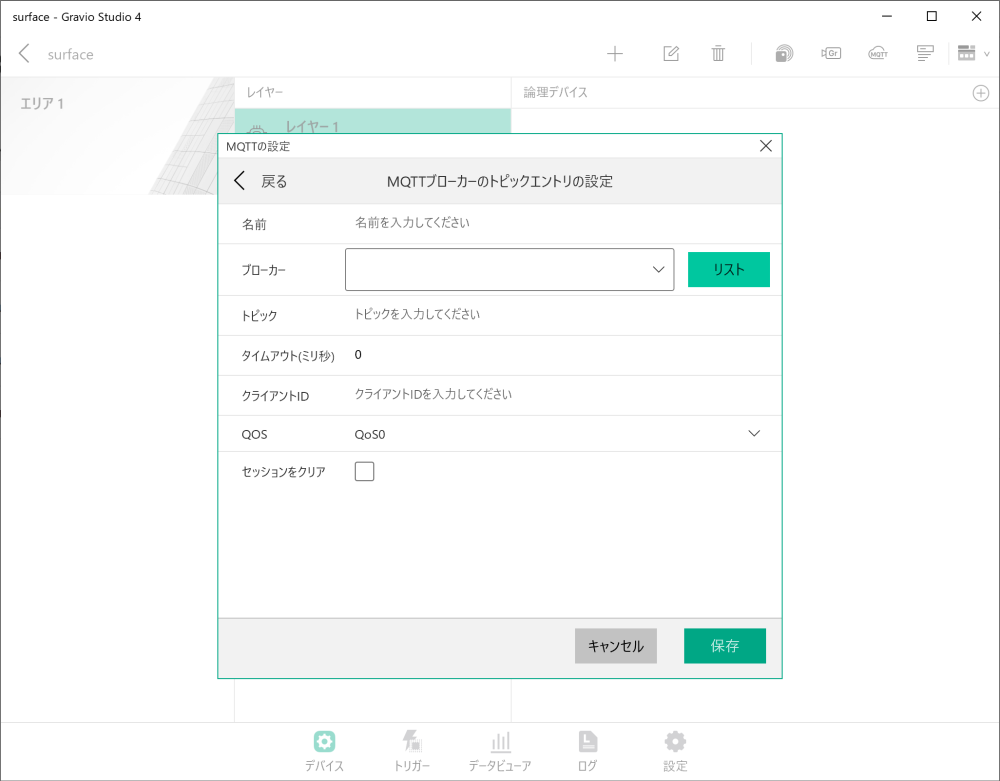
Click the “+” button to display the topic entry settings screen.
-
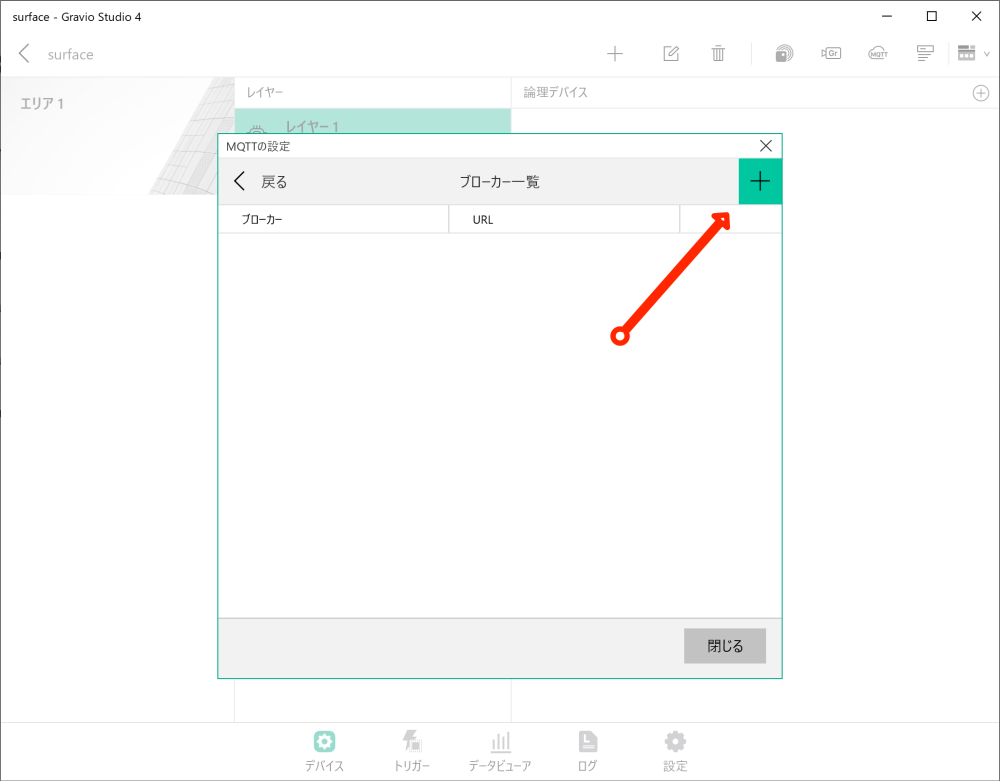
Click the list button to display the broker list screen.
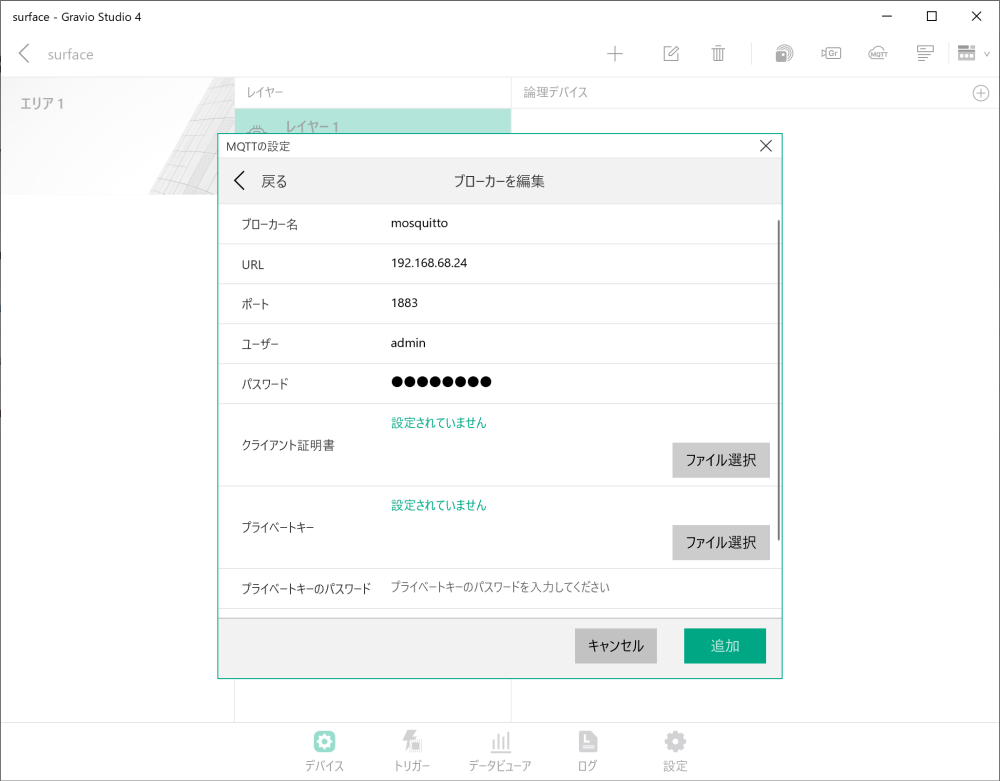
- Click the “+” button to display the broker settings screen and enter broker information:
- Name: Broker identifier
- URL: MQTT broker URL
- Port: MQTT broker port number (standard is 1883)
- Authentication: Username, password, etc.
-
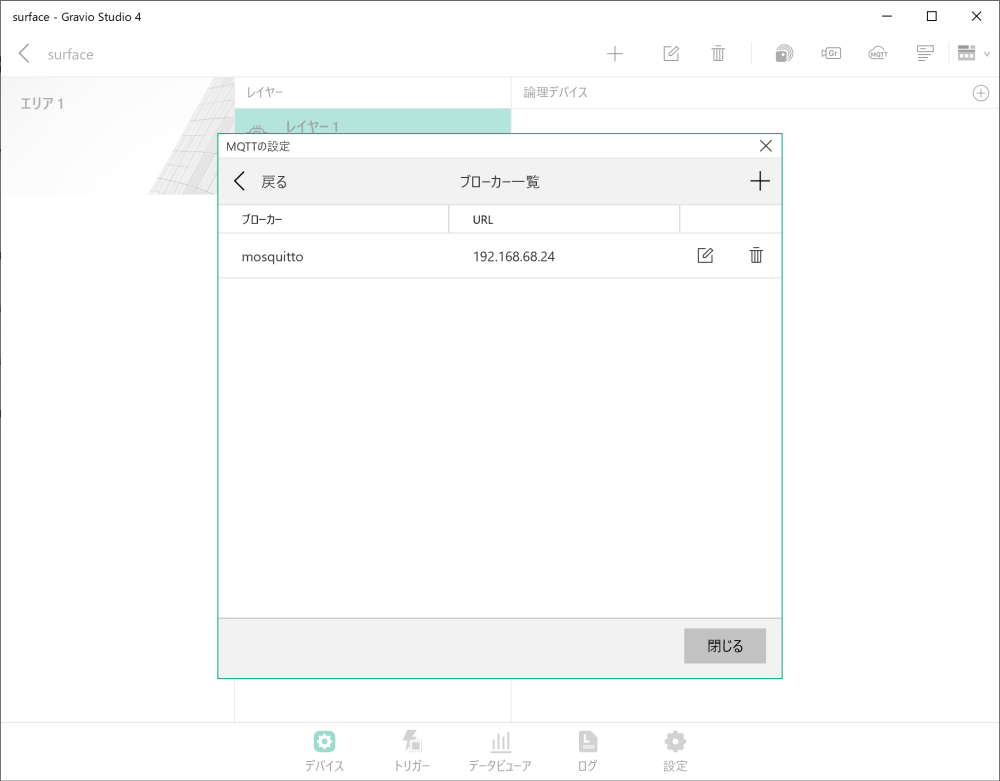
Enter broker information and click the add button.

-
After the added broker information appears in the list, click the “Back” button.
- Enter topic entry information and click save:
- Name: Topic identifier
- Broker: Previously registered broker
- Topic: MQTT topic to subscribe to
- Timeout: Connection timeout period
- QoS: Quality of Service level (0, 1, 2)
-
The saved topic entry will be displayed in the list.
-
Click the “+” button to display the binding settings screen.
-
Bind the configured MQTT to the layer.
-
Finally, turn ON sensor data collection.
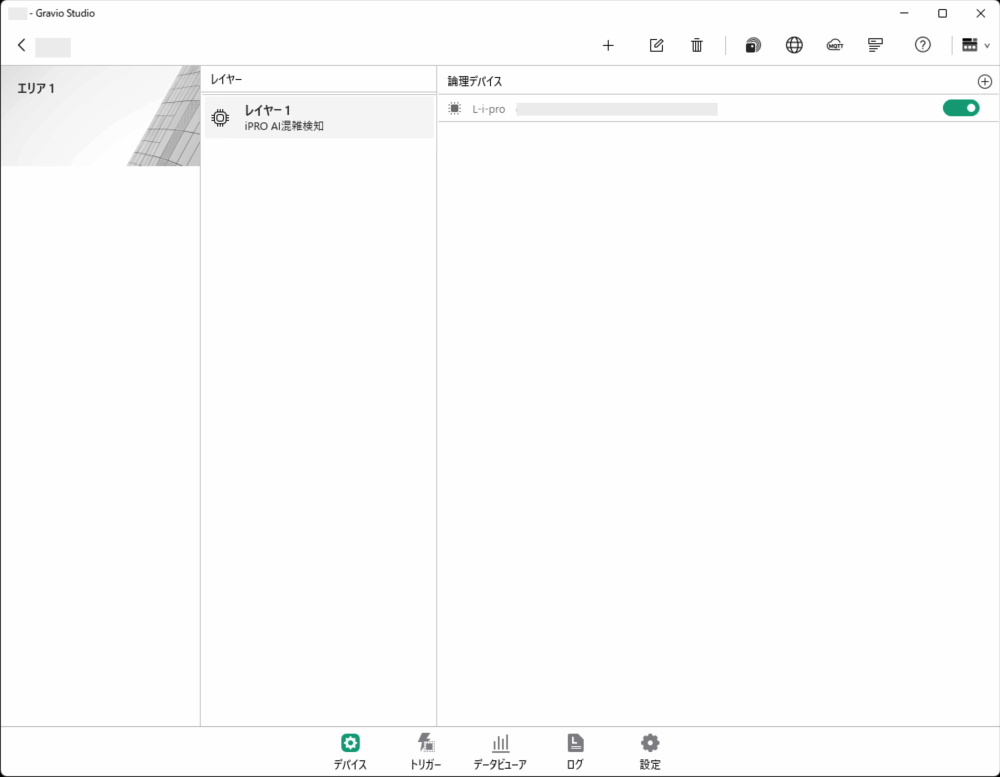
i-PRO Integration
i-PRO is a surveillance camera sold by i-PRO Co., Ltd. Here’s how to integrate with i-PRO in Gravio to receive AI-recognized data.
i-PRO Setup Procedure
- In “Devices,” select the i-PRO type (DataKind) to add a new area and layer.
- For i-PRO, select from AI Crowd Detection Face Recognition, AI Motion Detection, or General as the data format to receive.

-
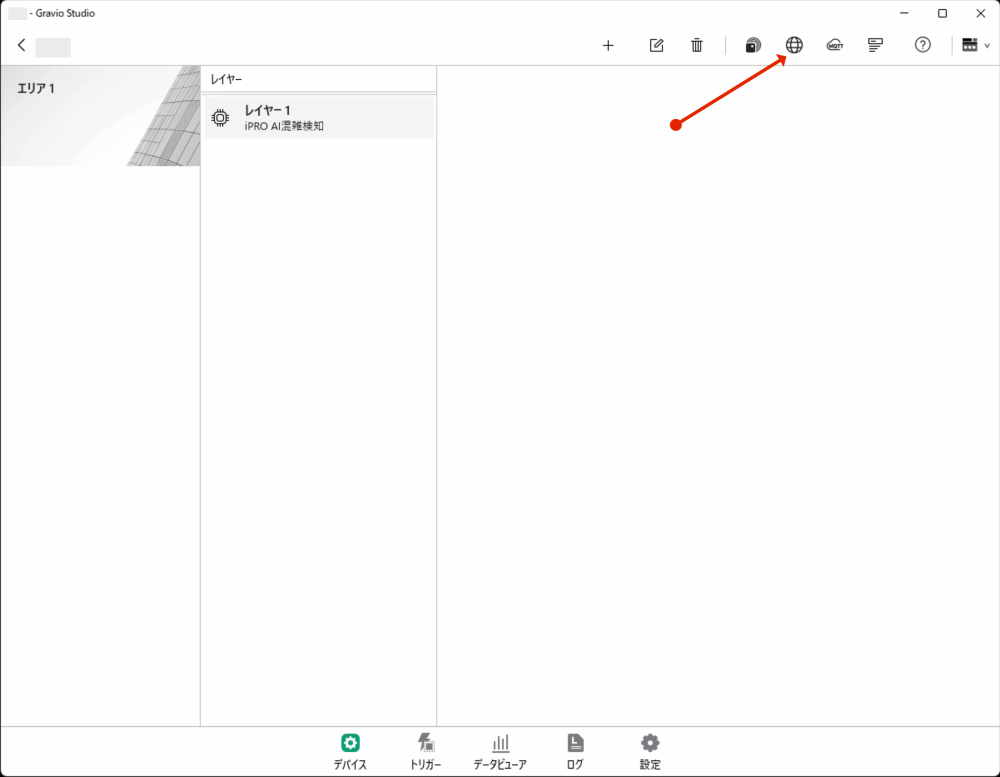
Click the settings button to display the i-PRO settings screen.
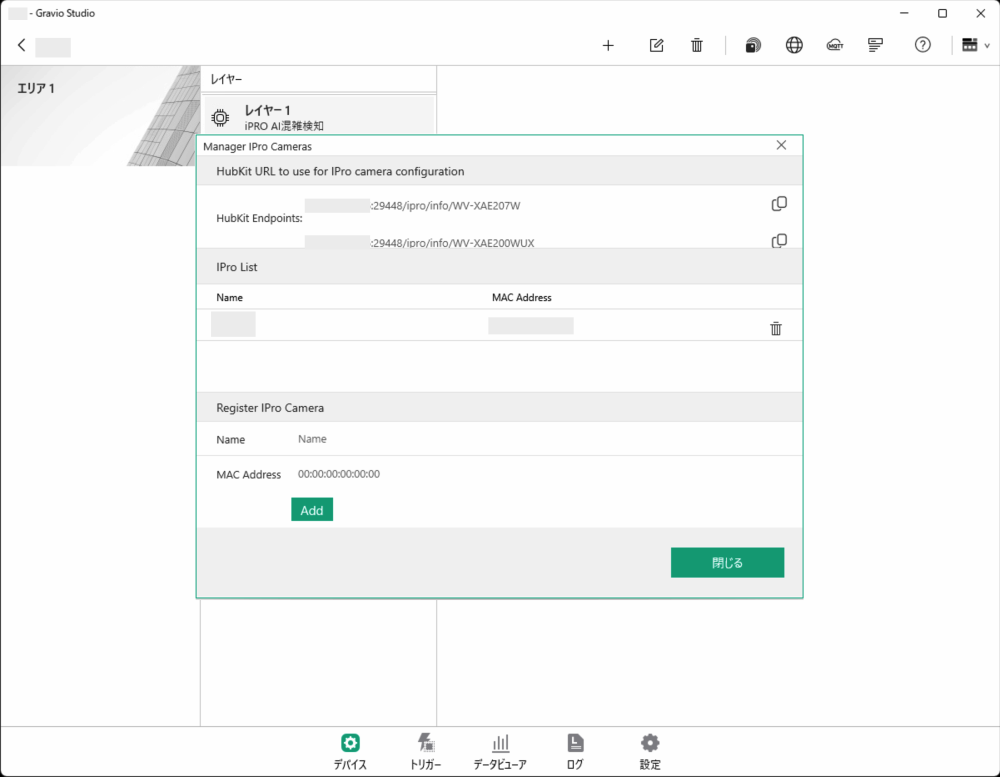
- Enter the i-PRO camera name and MAC address, then click add:
- Copy the HubKit URL to clipboard for registration in i-PRO
- For registration details, refer to “i-PRO Camera Setup Guide”
-
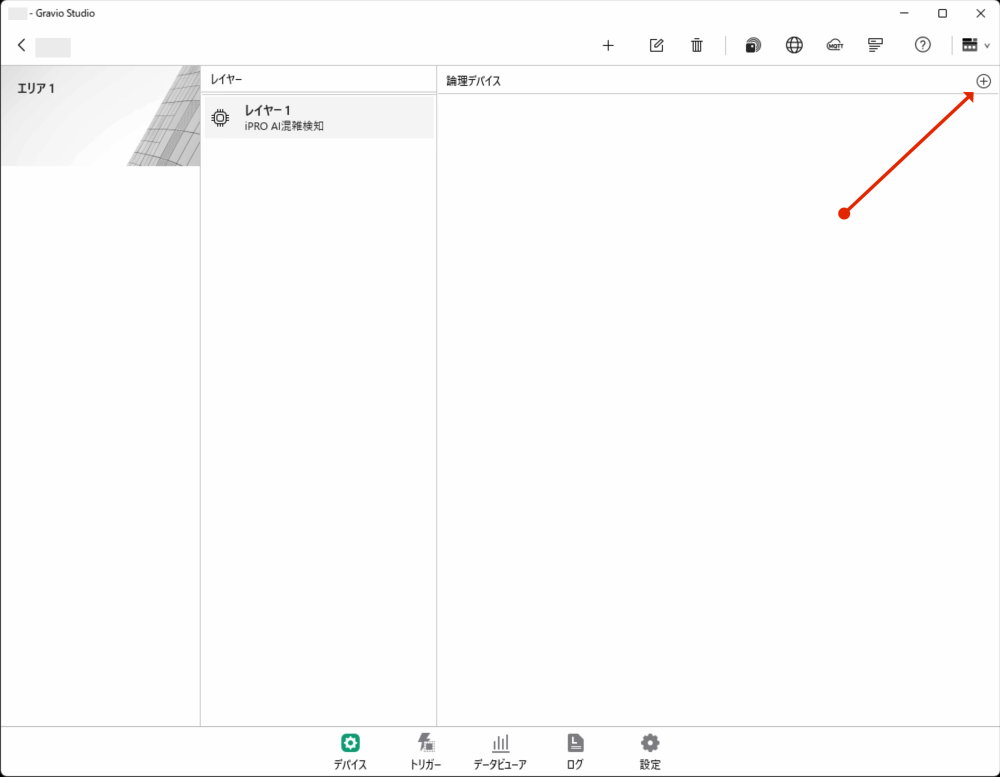
Click the “+” button to display the binding settings screen.
-
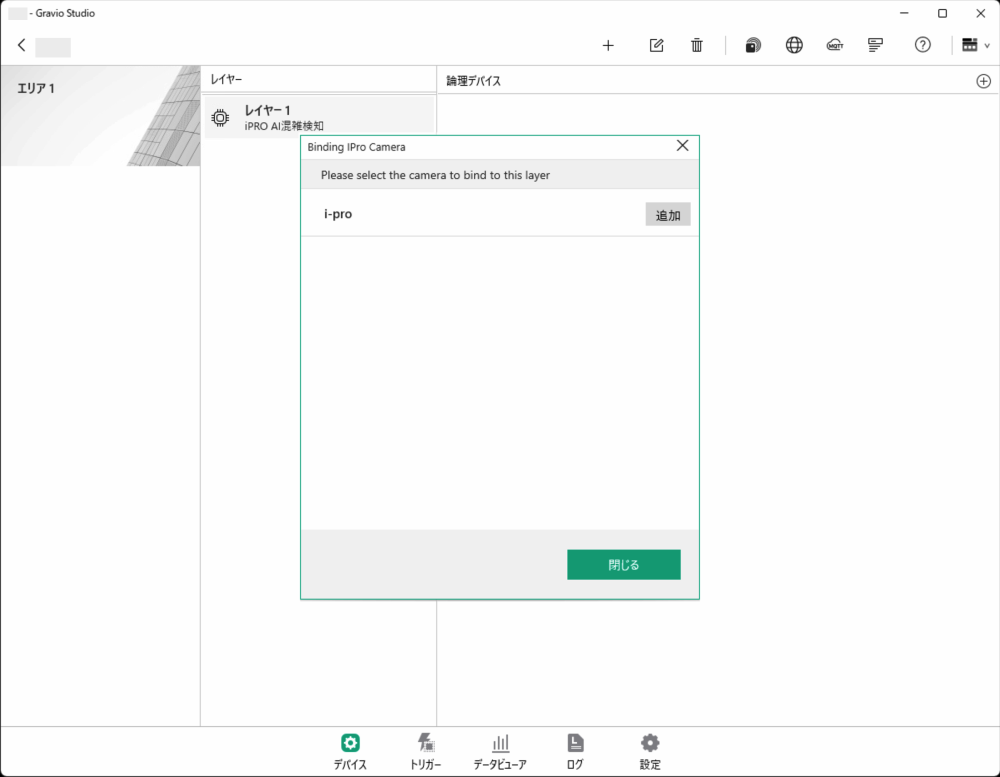
Bind the configured i-PRO camera to the layer.
-
Finally, turn ON sensor data collection.
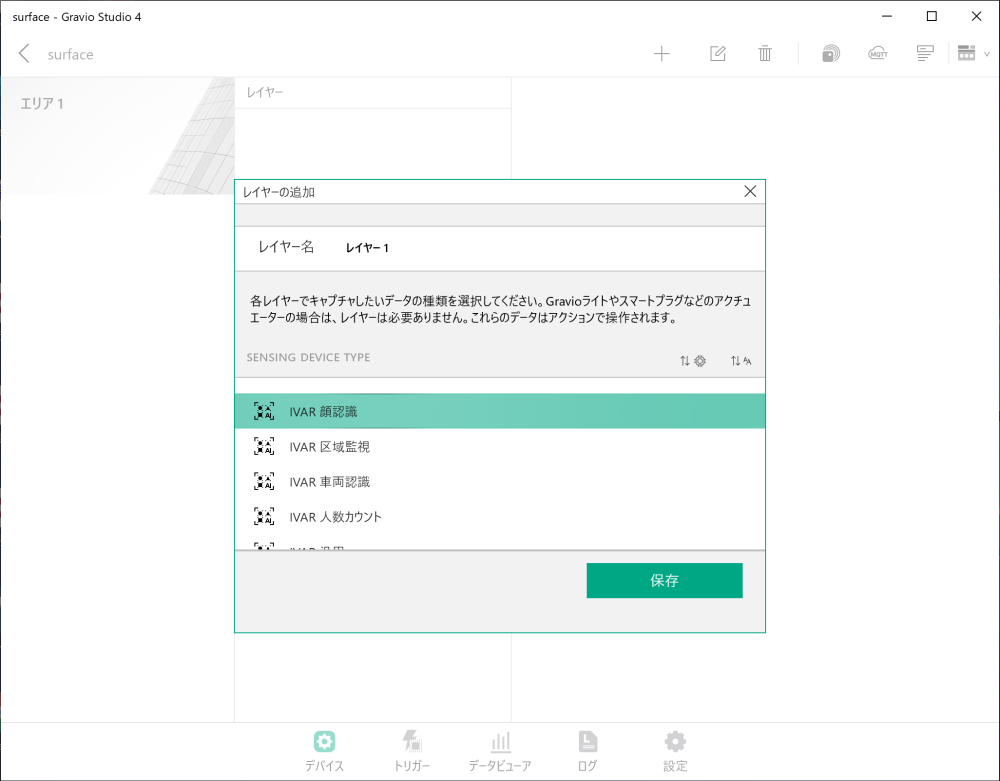
Gorilla IVAR Integration
Gorilla IVAR is a video analytics solution. Here’s how to integrate with Gorilla IVAR in Gravio to receive AI-recognized data.
Gorilla IVAR Setup Procedure
- In “Devices,” select the Gorilla IVAR type (DataKind) to add a new area and layer.
- For Gorilla IVAR, select from AI Crowd Detection, Face Recognition, or General as the data format to receive.
-
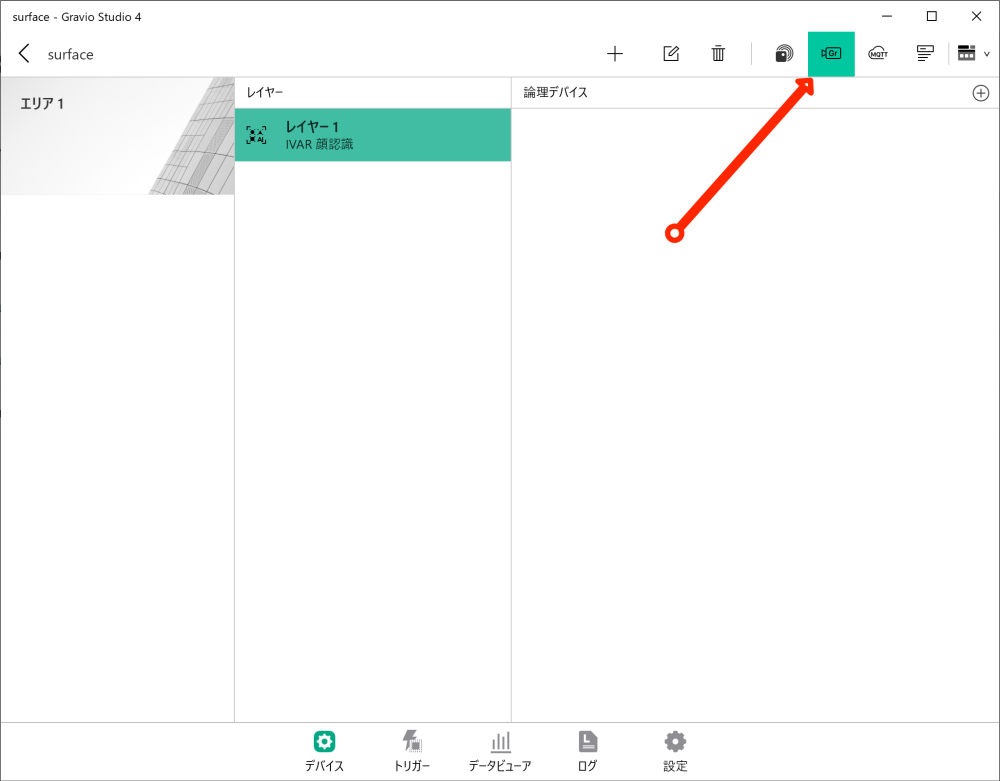
Click the settings button to display the Gorilla IVAR settings screen.
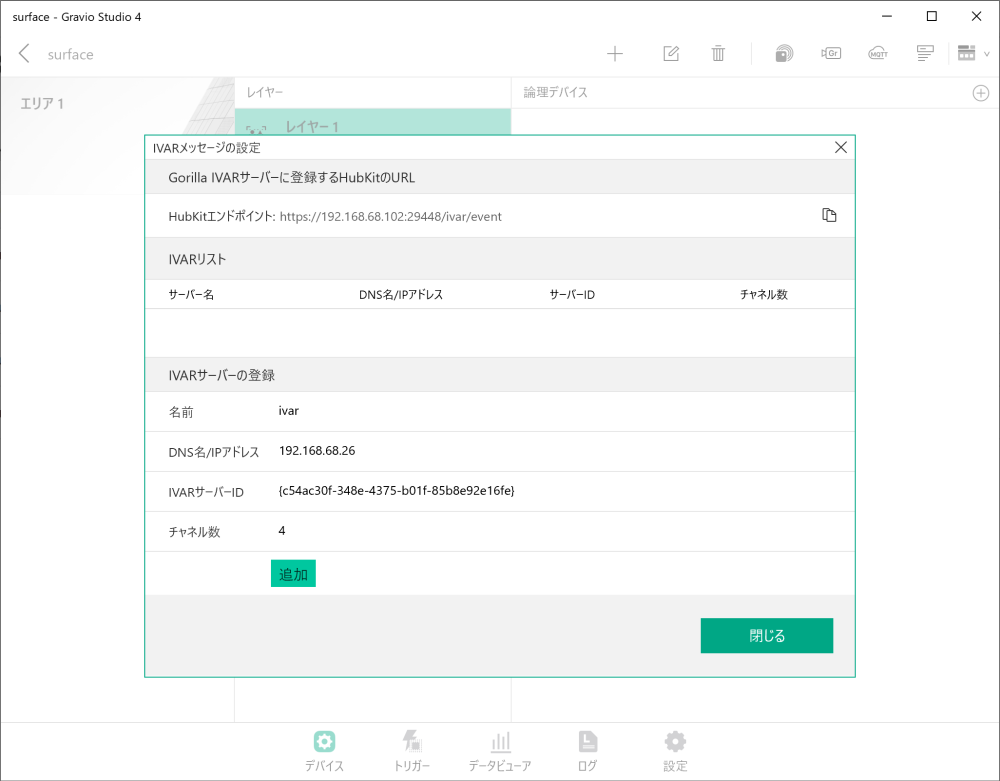
- Enter the Gorilla IVAR device name and connection information, then click add:
- Copy the HubKit URL to clipboard for registration in Gorilla IVAR
- For registration details, refer to “Gorilla IVAR Device Setup Guide”
-
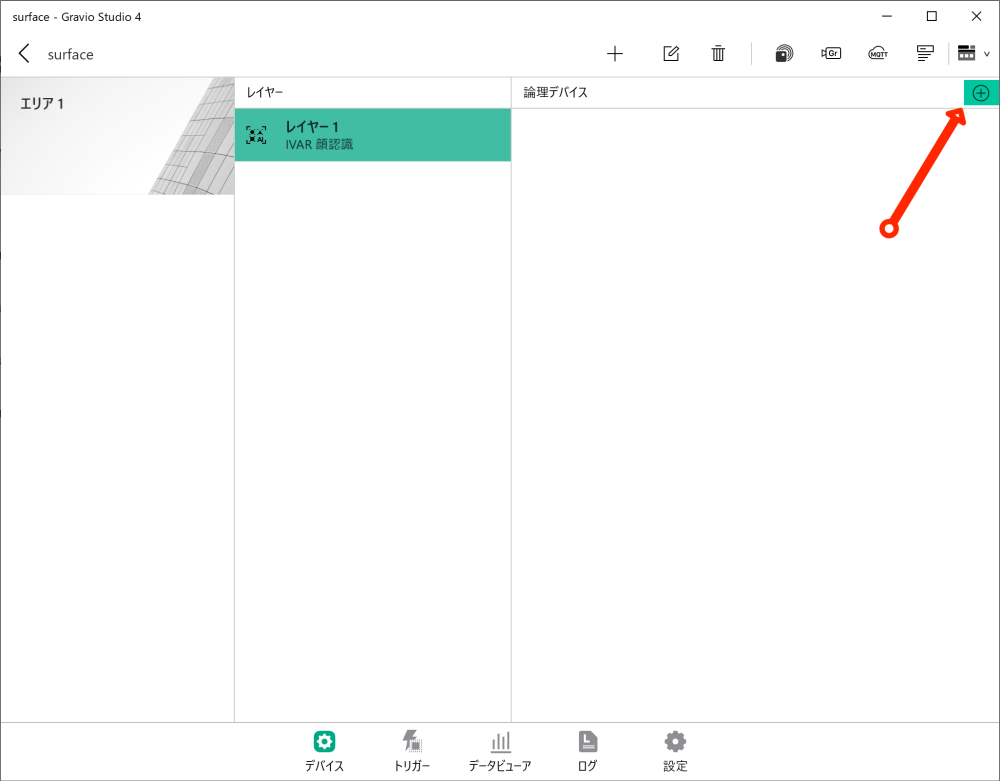
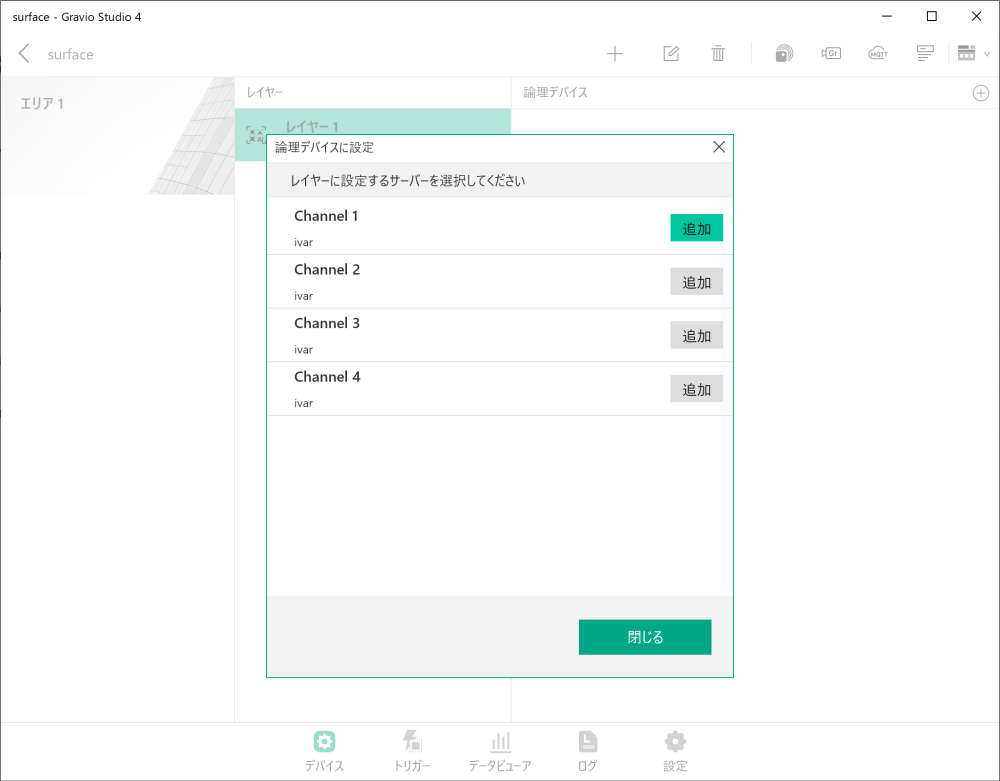
Click the “+” button to display the binding settings screen.

-
Bind the configured Gorilla IVAR device to the layer.
-
Finally, turn ON sensor data collection.
By following these steps, you can configure external system integration with Gravio HubKit.