Description
The WriteToExcel365 component can output data to a OneDrive in Excel format.
The use of this component requires a contract and pre-configuration of Office365 for Business and OneDrive for Business.
How to prepare your Microsoft account
- Prepare an Office365 account and log in to the Azure portal.
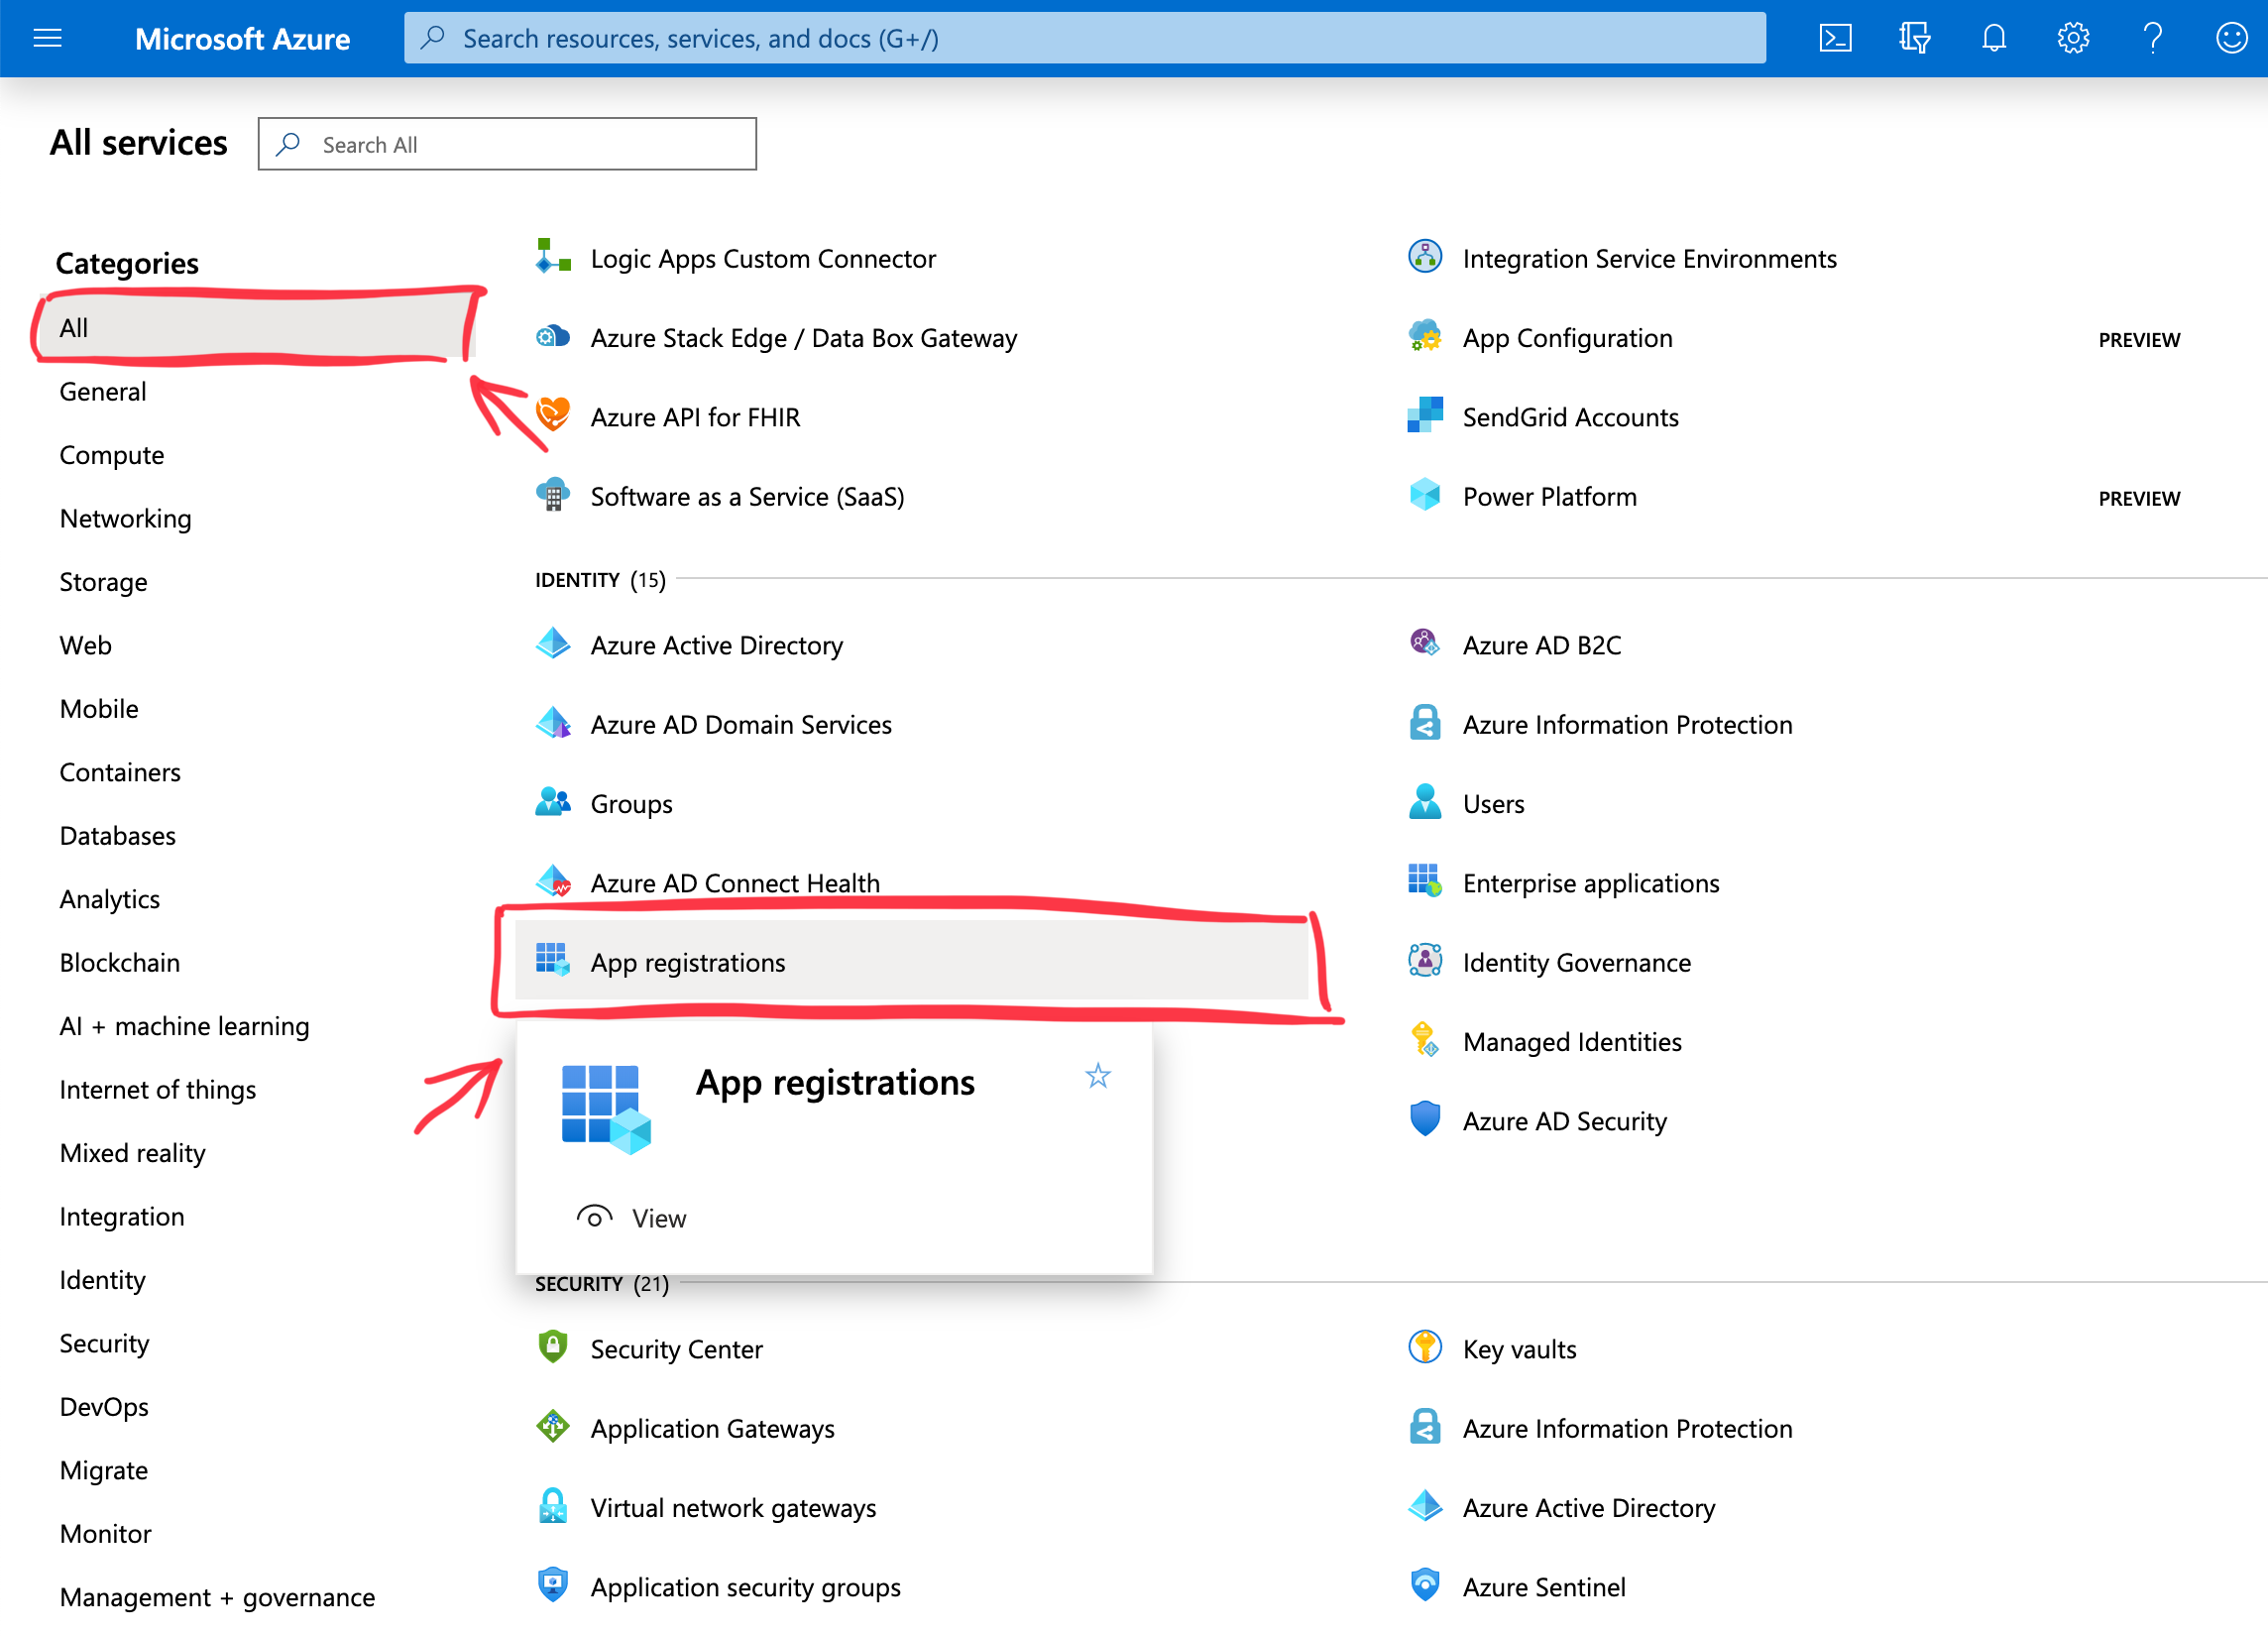
- Search for App registration in the Identity section to create an application.
- Give the app a meaningful name, and pick single tenant. (Note: if you don't have this single tenant option, you may not have a registered business account)

- Open the details screen after creating the application and note the displayed Application (Client) ID and Directory (Tenant) ID. You will need to enter them in Gravio.

- Put these values in the properties of the WriteToExcel365 component along with the email address and password of the Office365 account.
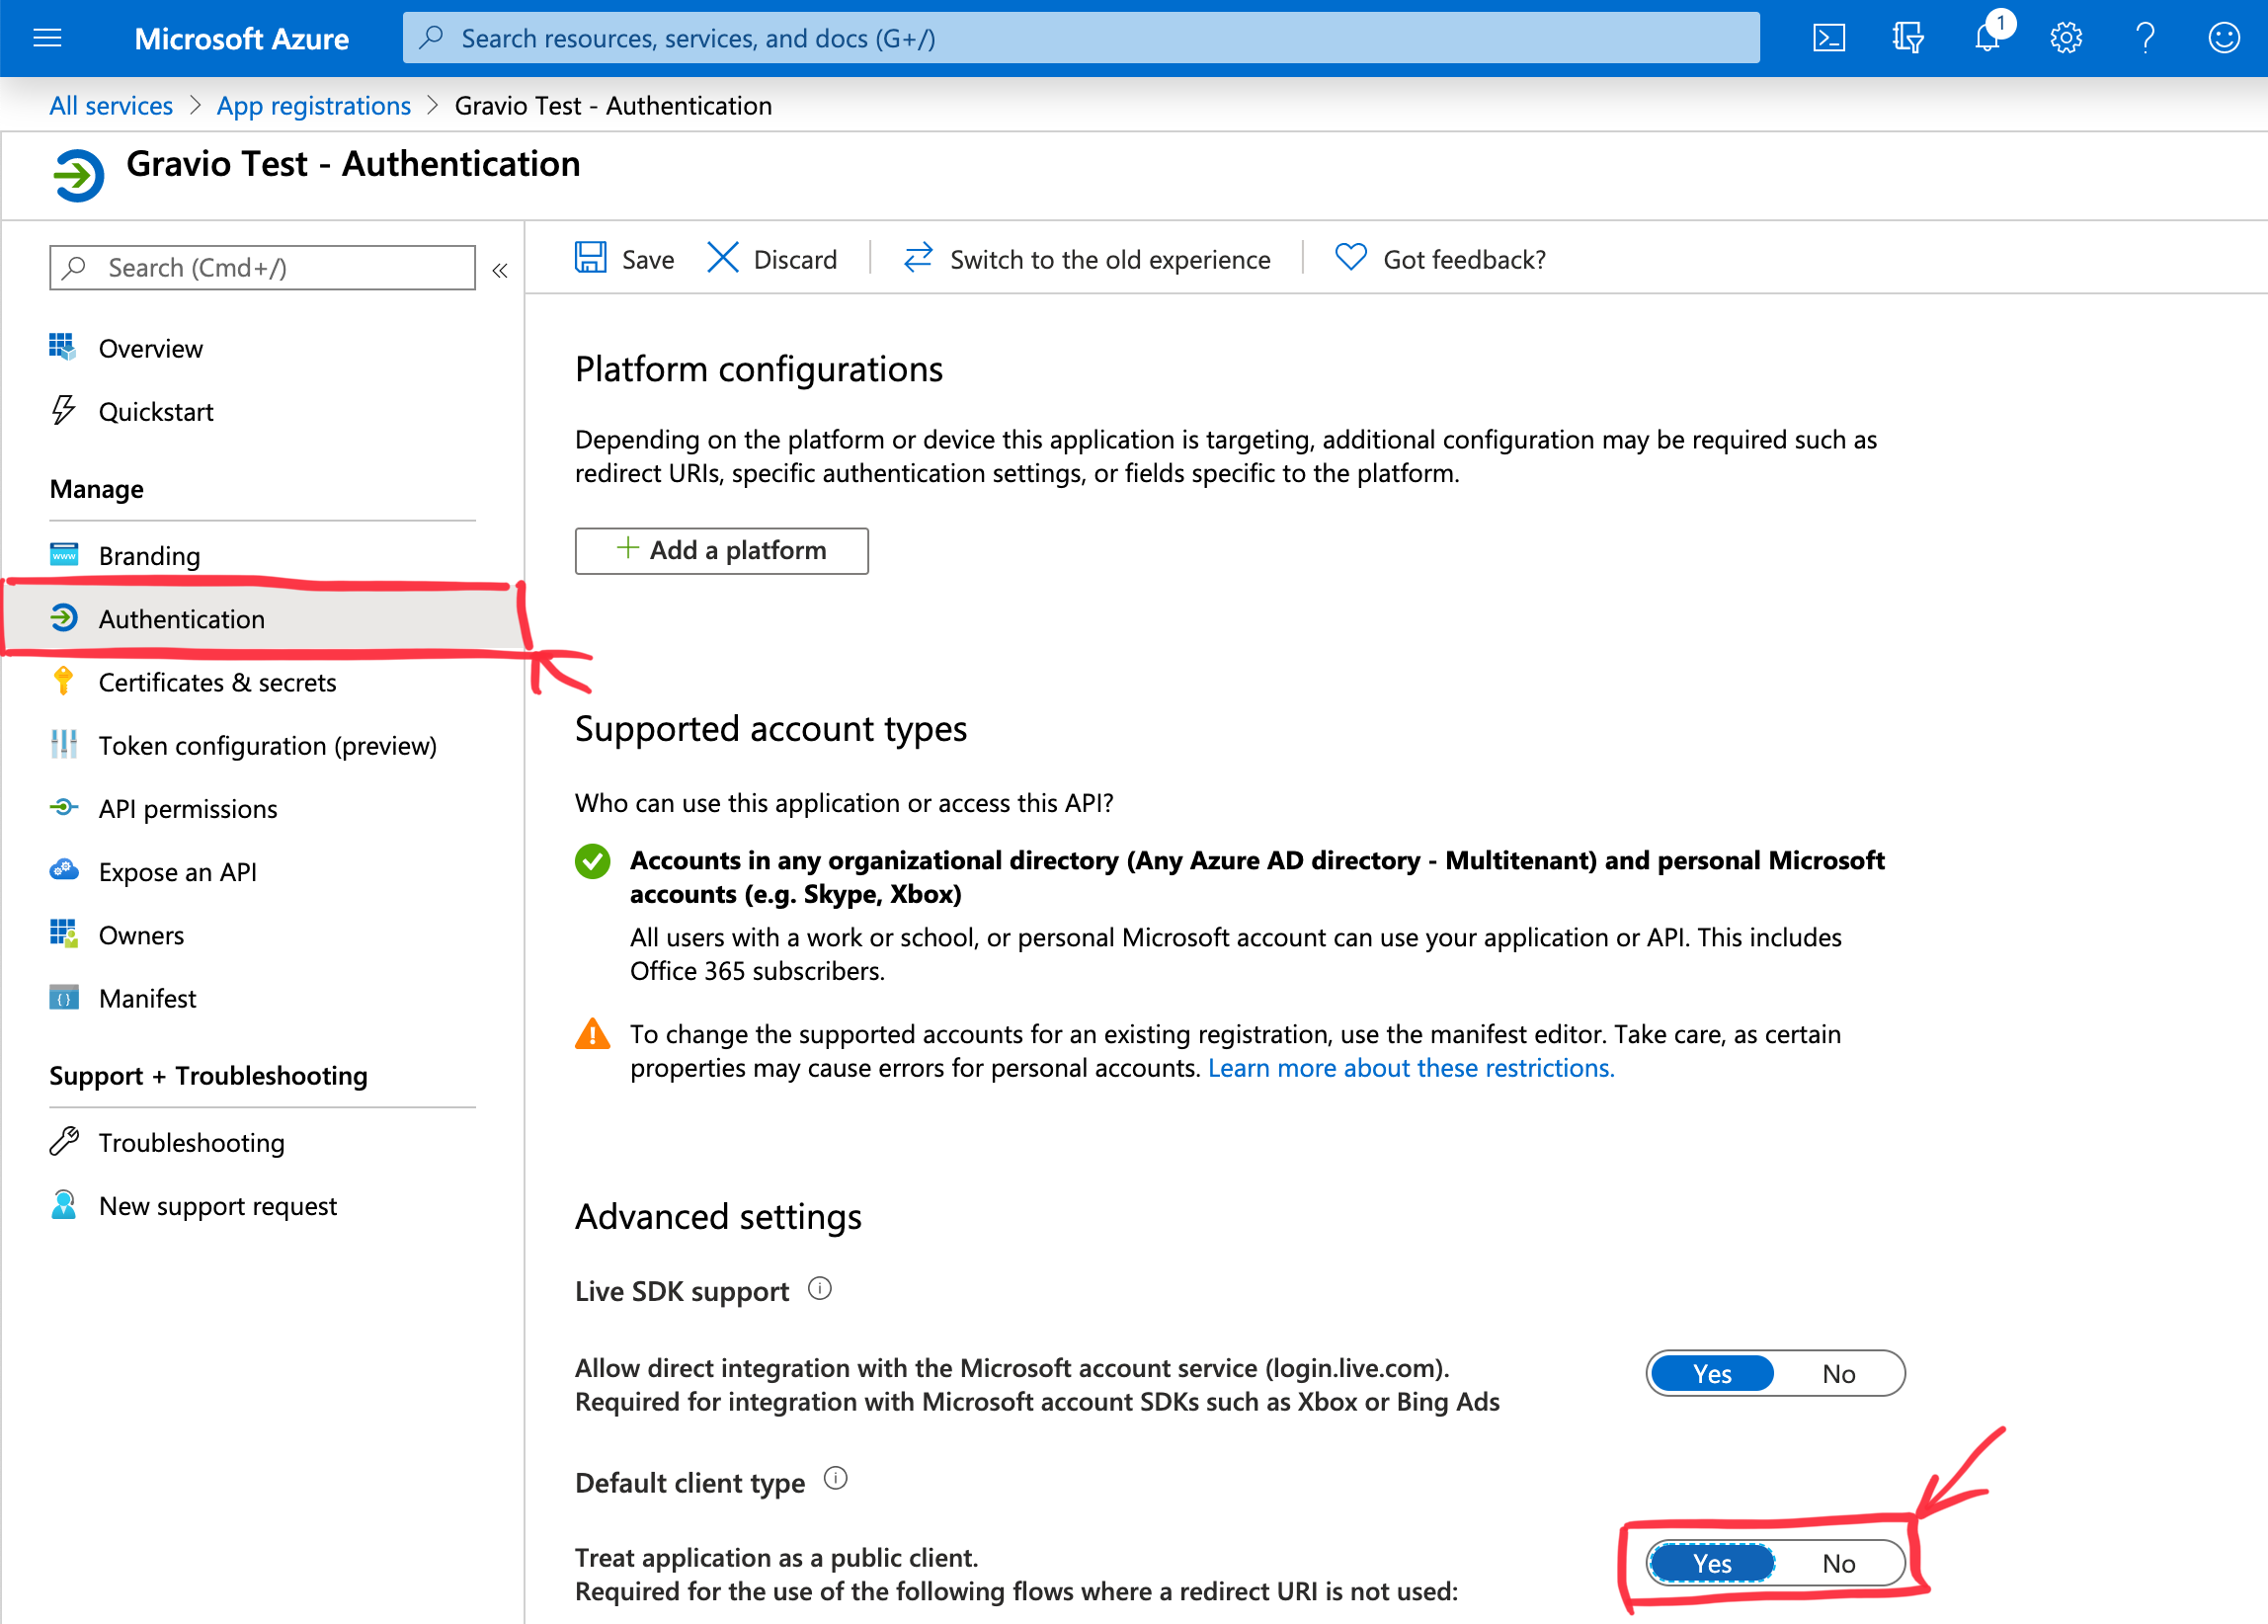
- Now go to Authentication and make sure the app is treated as a public client:
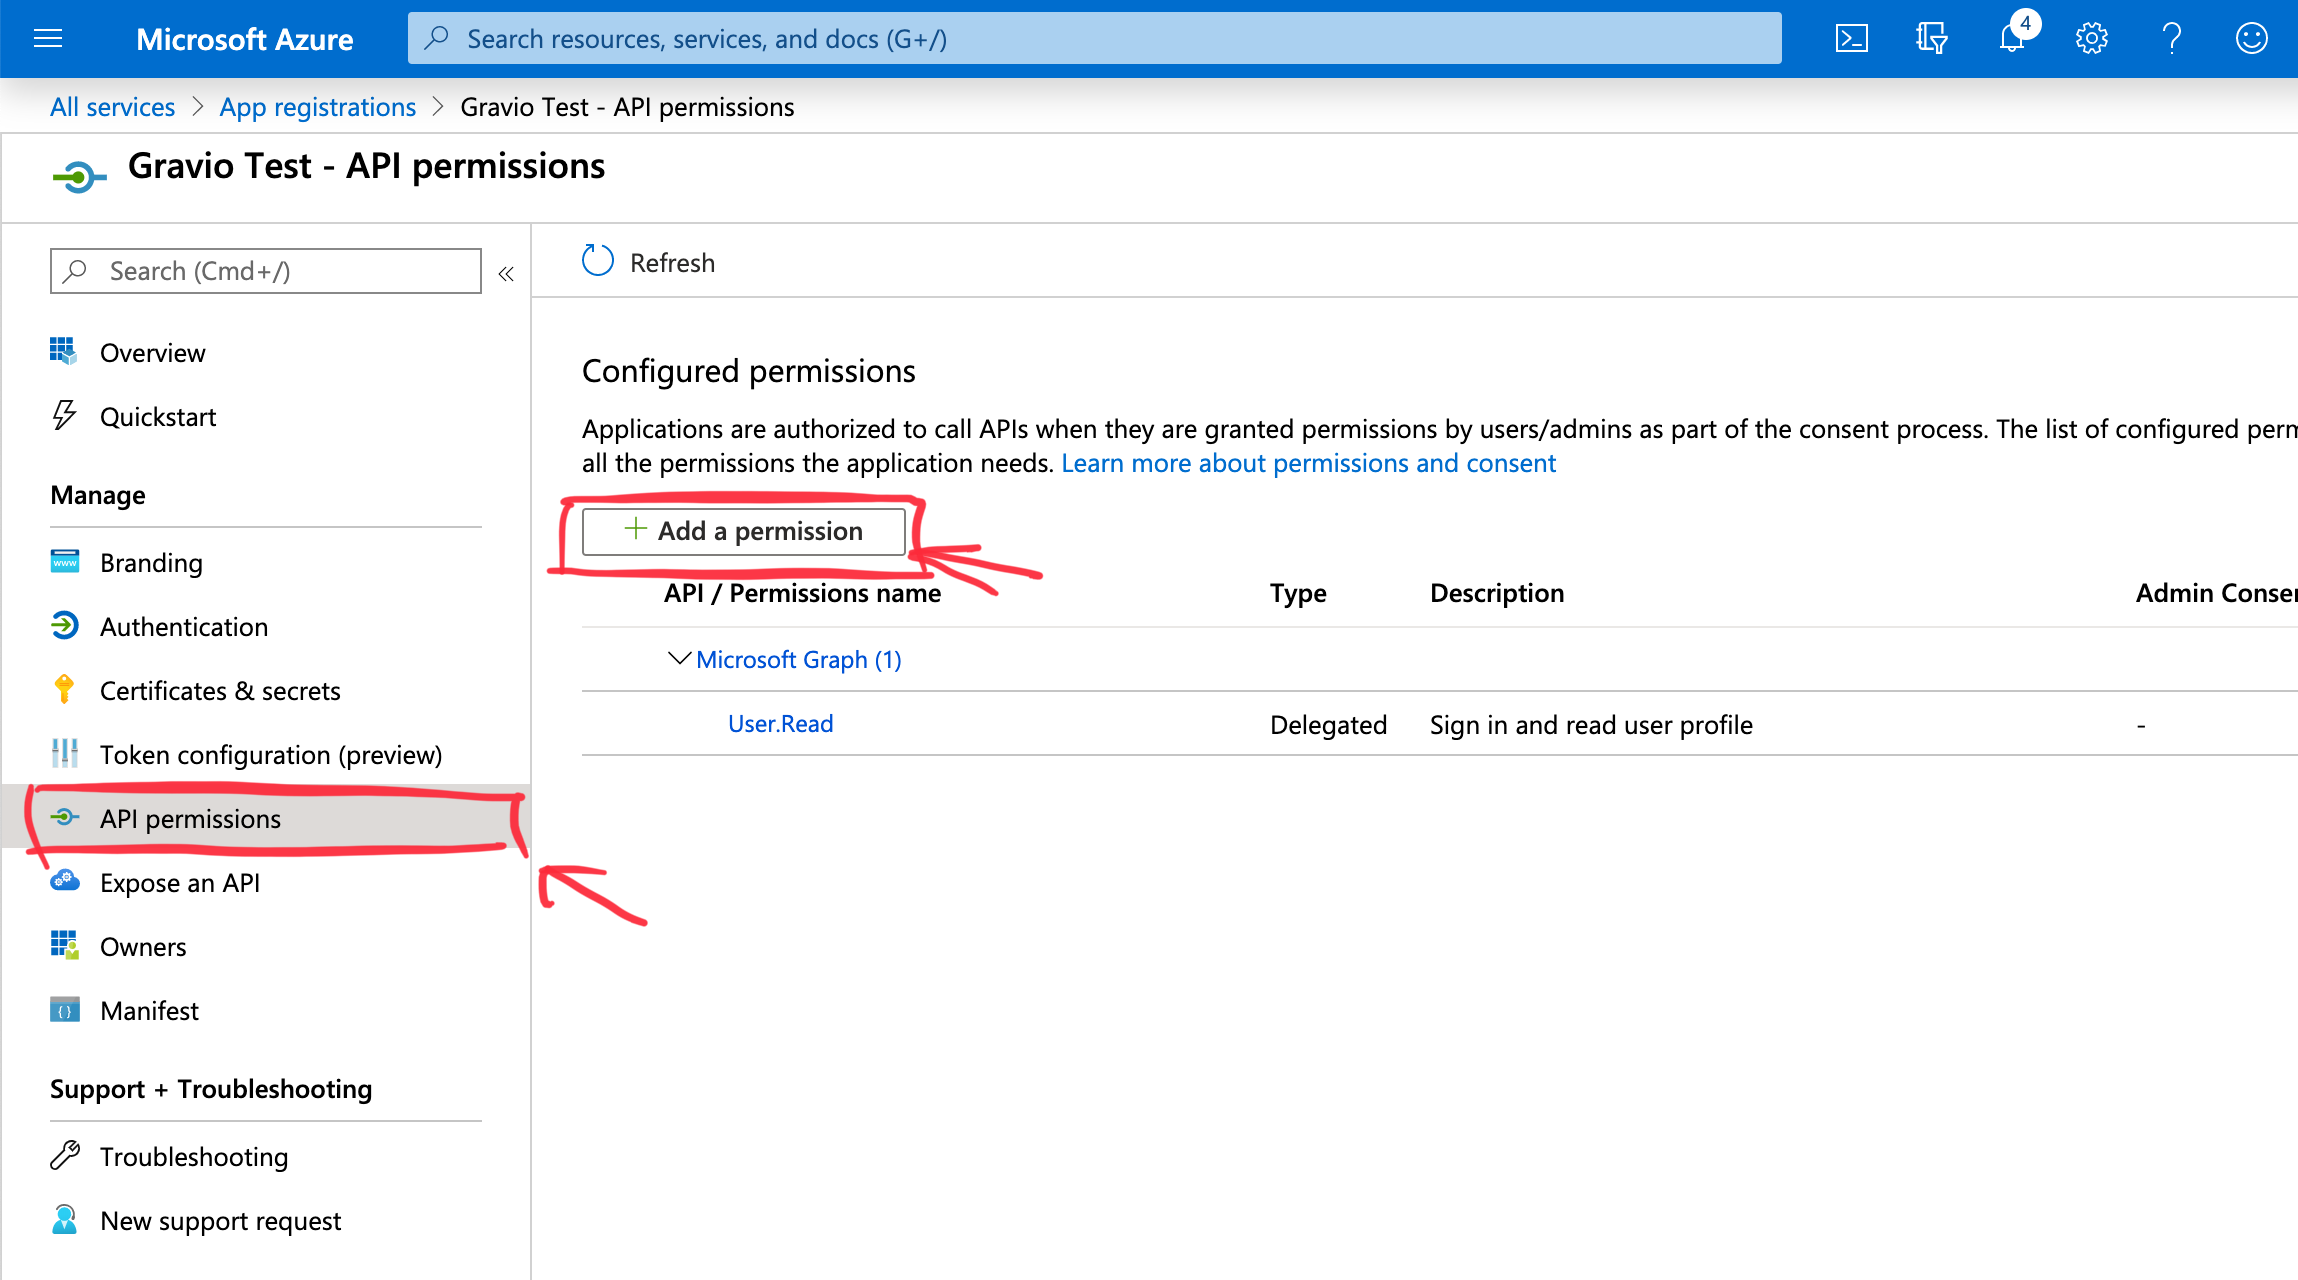
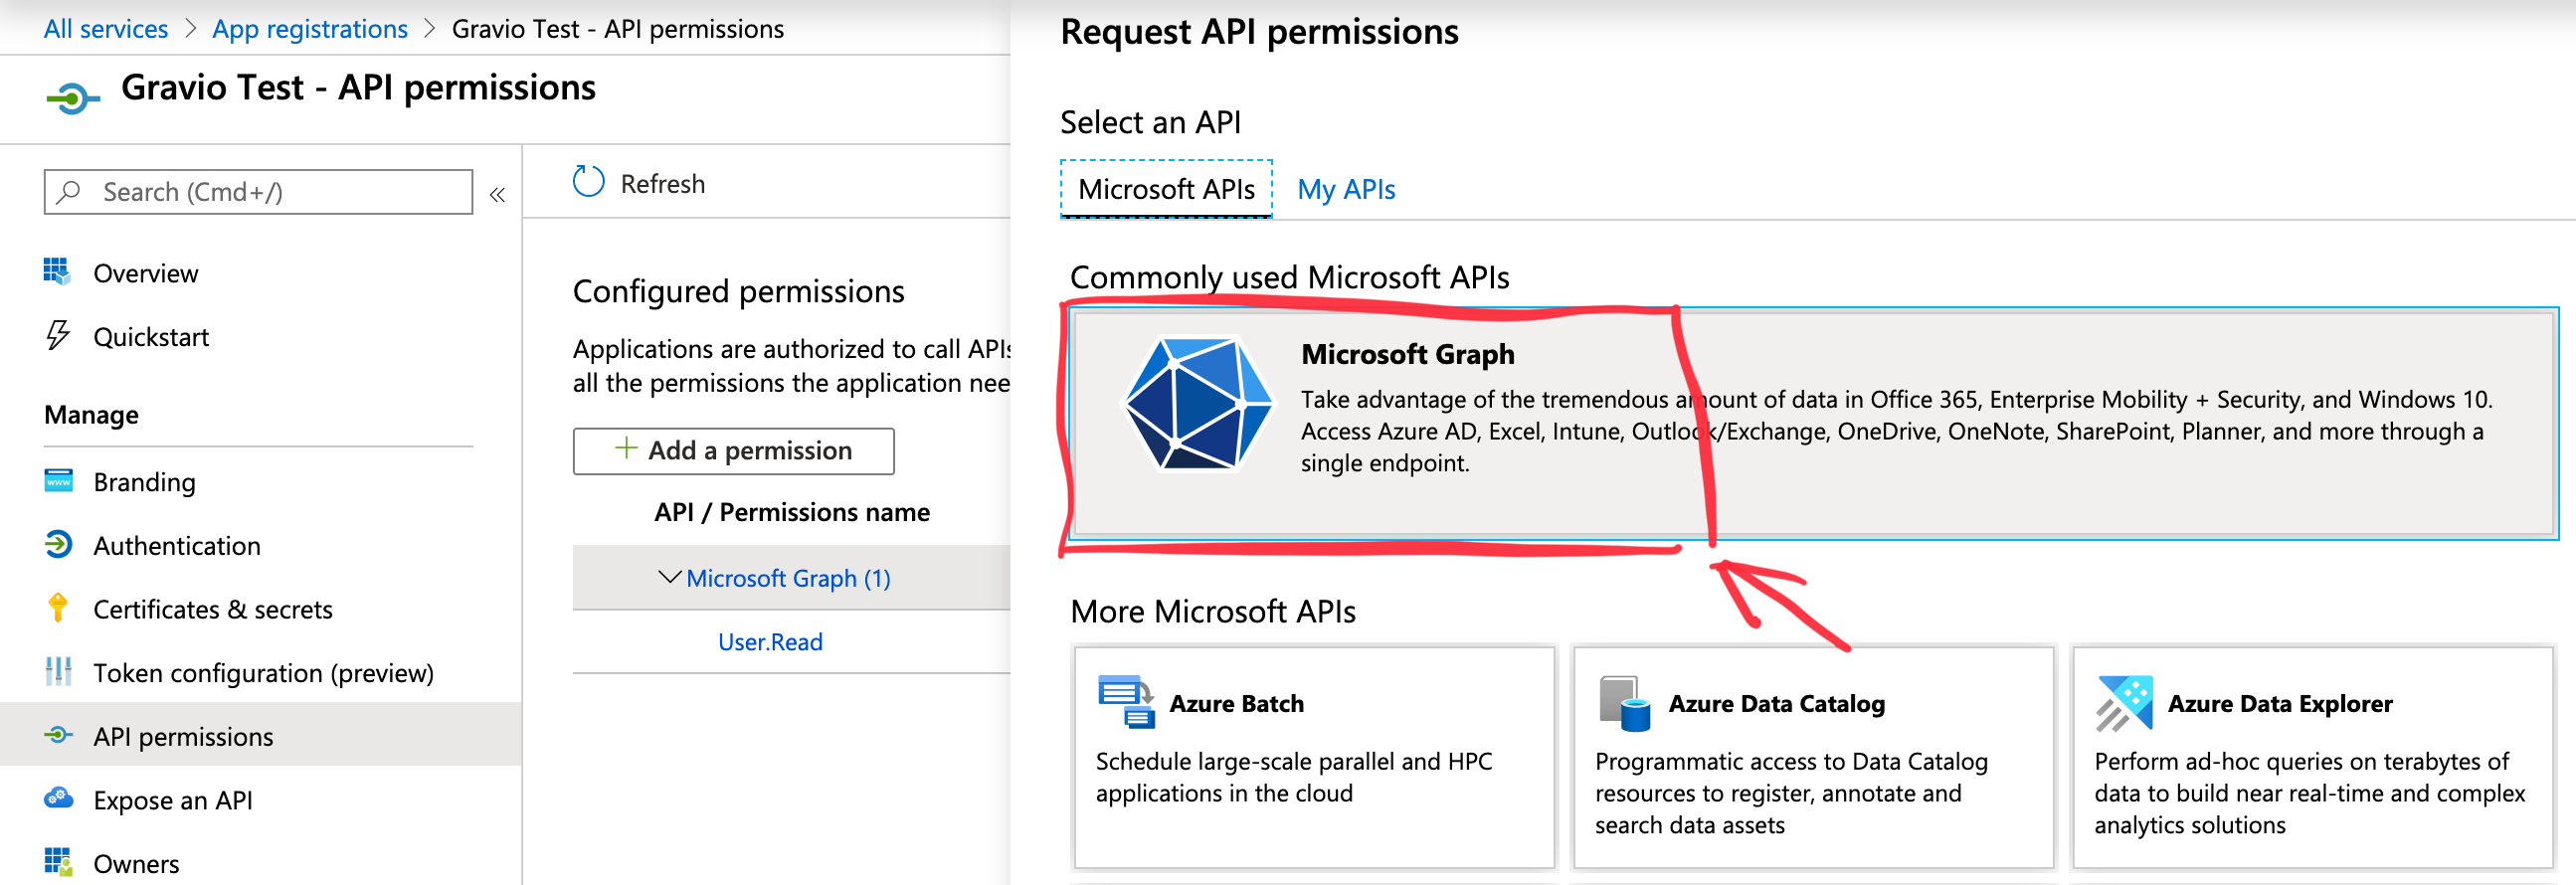
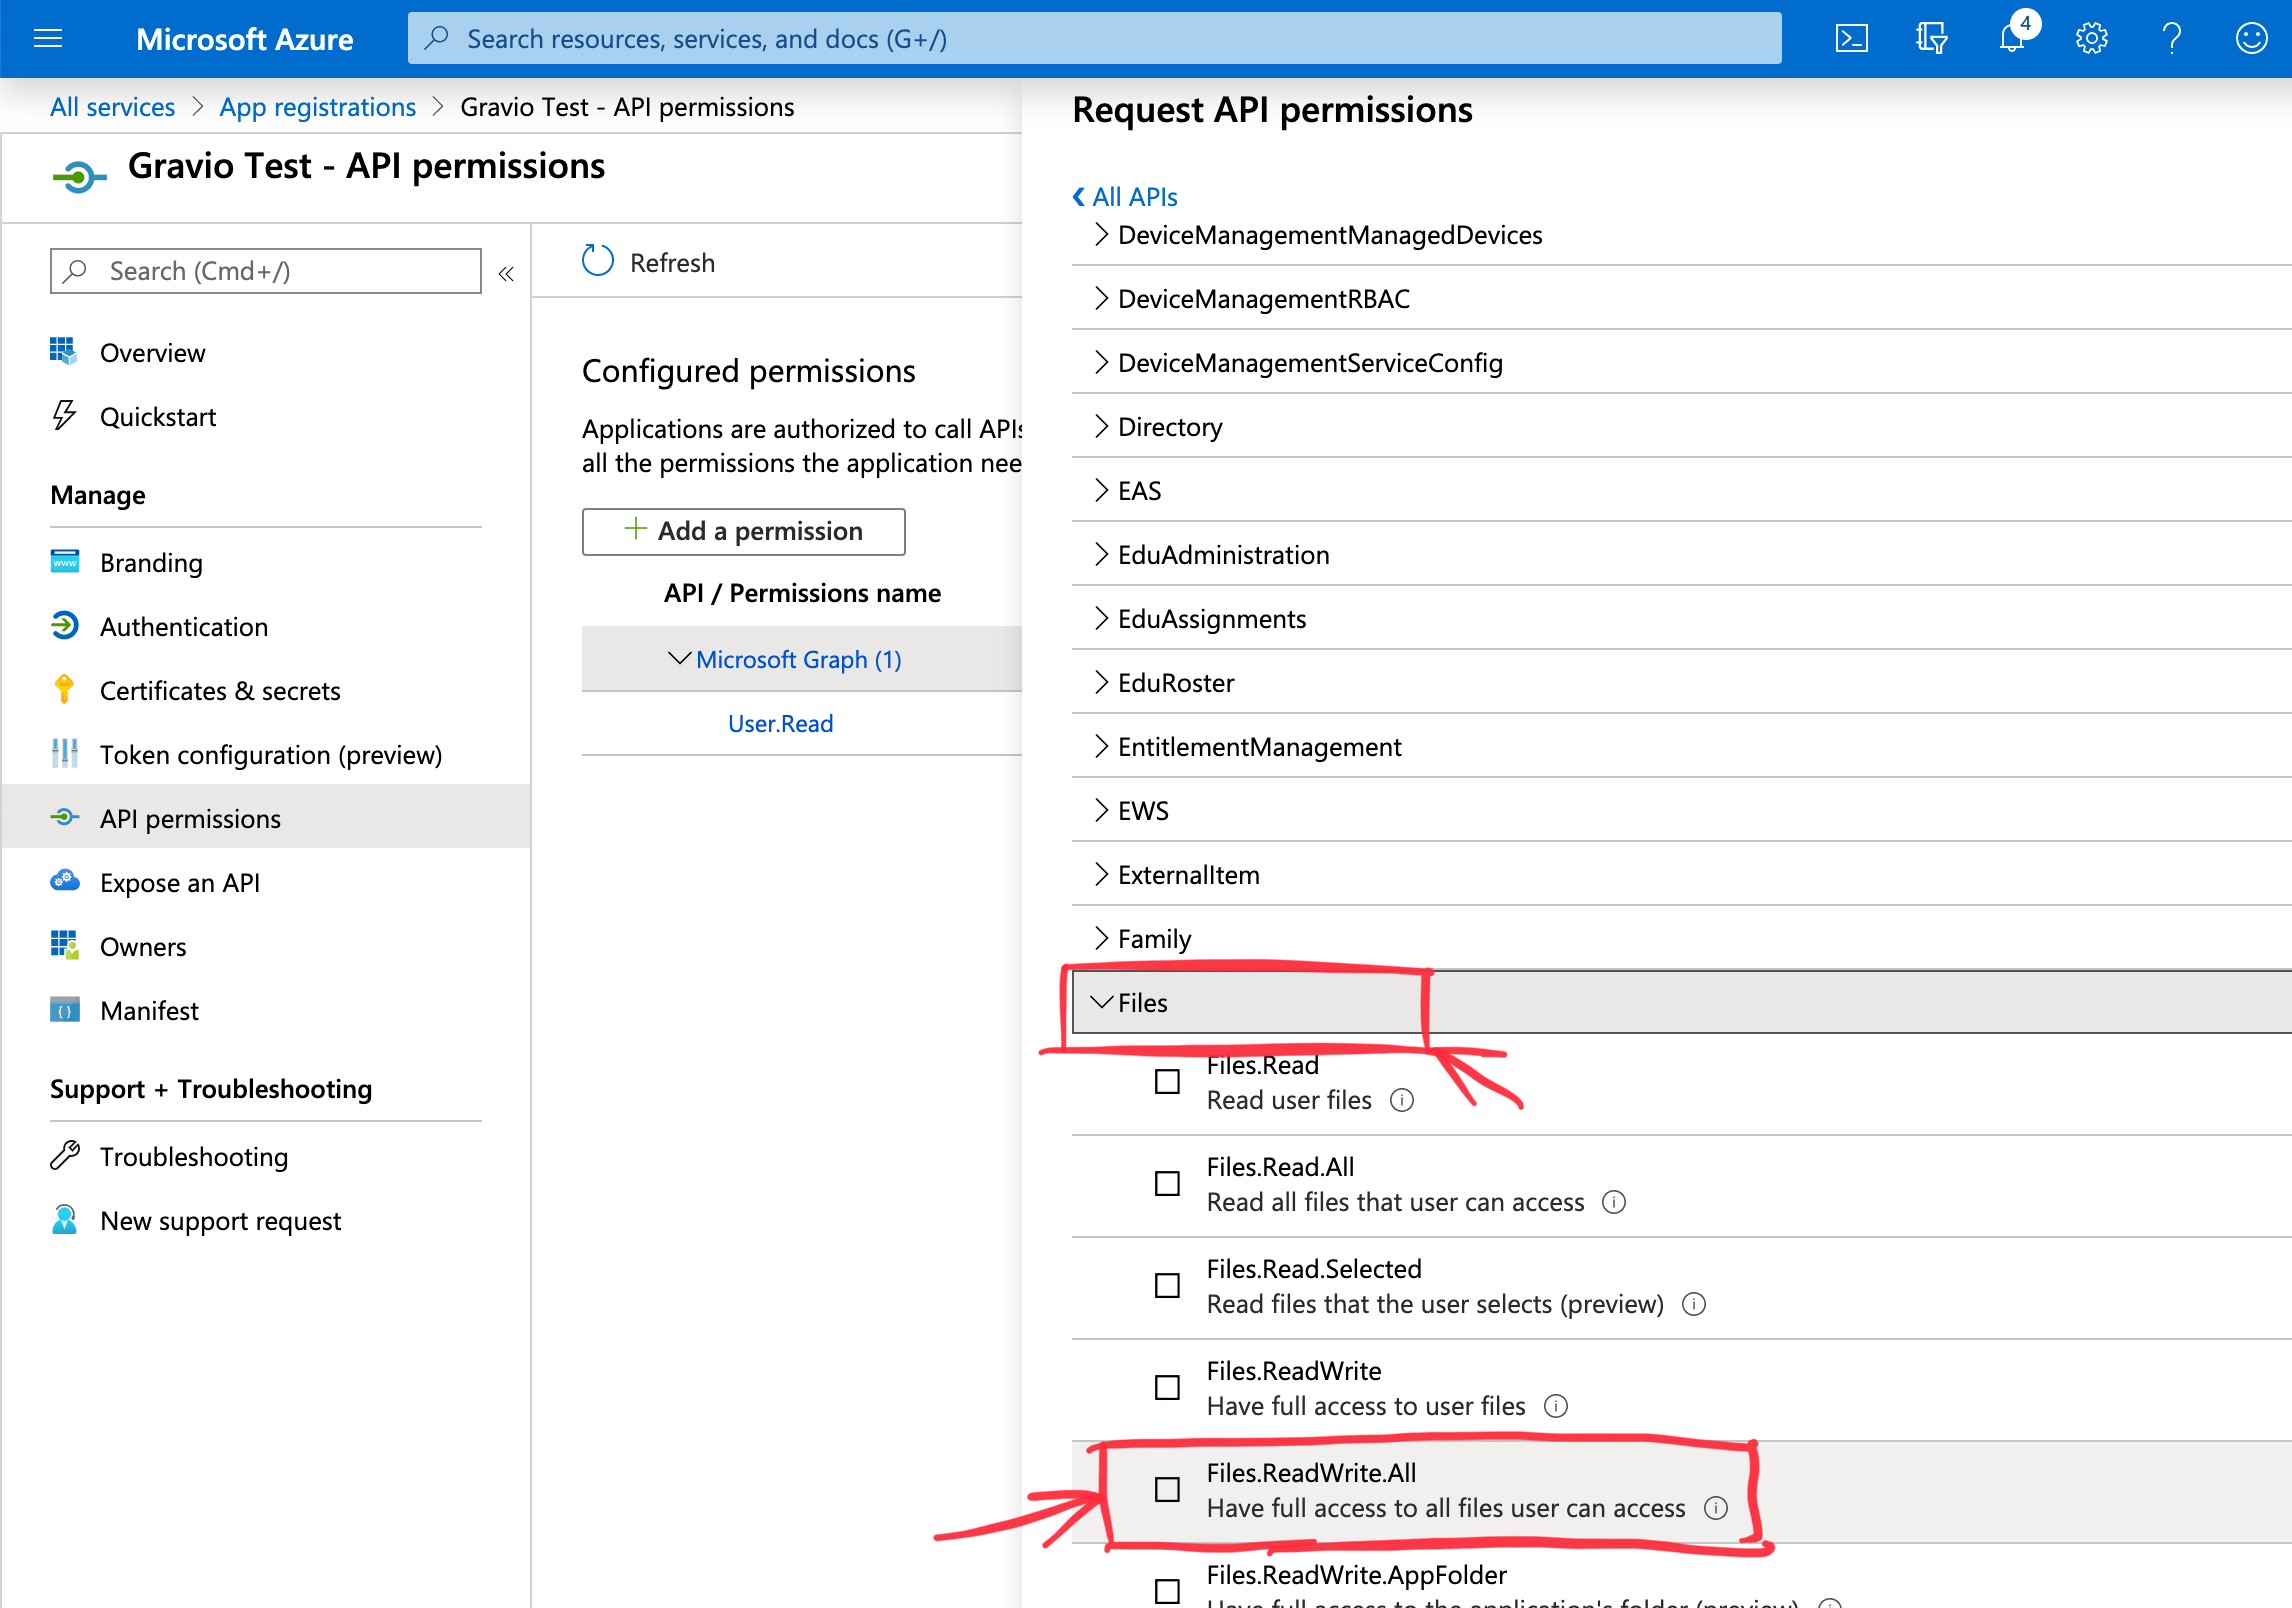
- Then open API Permissions and add Files.ReadWrite.All permissions, which you can find under the Microsoft Graph section.

- The preparation is now complete.
Component Properties
| Property Name | Description |
|---|---|
| File Name | Specify Excel file name to output |
| Sheet Name | Specify sheet name to output data |
| Write Mode | Specify whether to overwrite (Replace) the file or append the data (Append). The value of cp.WriteMode can be either "Append" or "Overwrite". |
| Output header | Select whether to output header when outputting data |
| Column Mapping | Specify which column of Excel to output among the columns of step output. More than one can be specified. (Example: To output Step_a of step output to column A of the Excel and Step_c to column B of Excel, specify Step_a: A, Step_c: B and the field of step output and the column of Excel with :, If you specify more than one, separate with , comma) |
| Client Id | Specify Application (client) ID |
| Tenant Id | Enter the Directory (tenant) ID |
| Instance | Only change if your Azure account is hosted on a custom domain, as opposed to on Microsoft's domain |
| Username or Email | Specify Office365 Business account |
| password | Specify password for Office365 Business account |