Sensor and Device Connection Guide
This page describes how to connect sensors and IoT devices to Gravio, including the device-side setup procedure and the underlying communication protocols.
For information about how to use these devices from action flows (component properties, etc.), see the Gravio Action Reference. For Web UI configuration, also see the Gravio HubKit Web UI Guide.
Table of Contents
- 1. Gravio LED Matrix Gen2
- 1.1 Hardware Overview
- 1.2 Initial Setup
- 1.3 Control Interfaces
- 1.4 MQTT Protocol Specification
- 1.5 HTTP API Specification
- 1.6 Hybrid Mode (Layer Composition)
- 1.7 Using from Gravio HubKit
1. Gravio LED Matrix Gen2
The Gravio LED Matrix Gen2 is a 32×32 pixel full-color LED matrix display device. It can be controlled either over MQTT (via Wi-Fi) or via HTTP.
Available since Gravio HubKit 6.3.0: For details on the dedicated components for this device, see Gravio HubKit / Gravio Studio Change Log: Gravio Matrix Gen2 Components.
Important: This second-generation device is a completely different product from the original Gravio Matrix (Gen1). The hardware, connection method and device ID format are all different. When controlling it from Gravio HubKit, you must use the dedicated
Gravio Matrix Gen2components (the two product lines are not interchangeable). See the Gravio Action Reference for details.
1.1 Hardware Overview
Power
- USB Type-C cable
- 5 V / 1 A power adapter
Buttons and Switches
| Button / Switch | Function |
|---|---|
| Top button | Toggles the display panel ON/OFF. Each press flips the display state |
| Back button | Long press to reboot the device |
| Top DIP switch | ON: The device automatically detects orientation and adjusts the display OFF: Locks and saves the current display orientation |
1.2 Initial Setup
- Connect power (USB Type-C). The device boots automatically and displays:
- The
Graviologo (about 2.5 seconds) - The device name
Gravio Matrix Gen 2(about 2.5 seconds) - If Wi-Fi is not configured or the device cannot connect to the configured network, it boots into AP (access point) mode. The screen shows the current SSID (for example,
Gravio-MTX-XXXXXXXX). - From a PC or smartphone, connect to that SSID using the password
graviohub. -
Open http://192.168.6.1:8080 in a browser. The User Login screen appears. Sign in with the following default credentials:
-
Username:
gravio - Password:
gravio
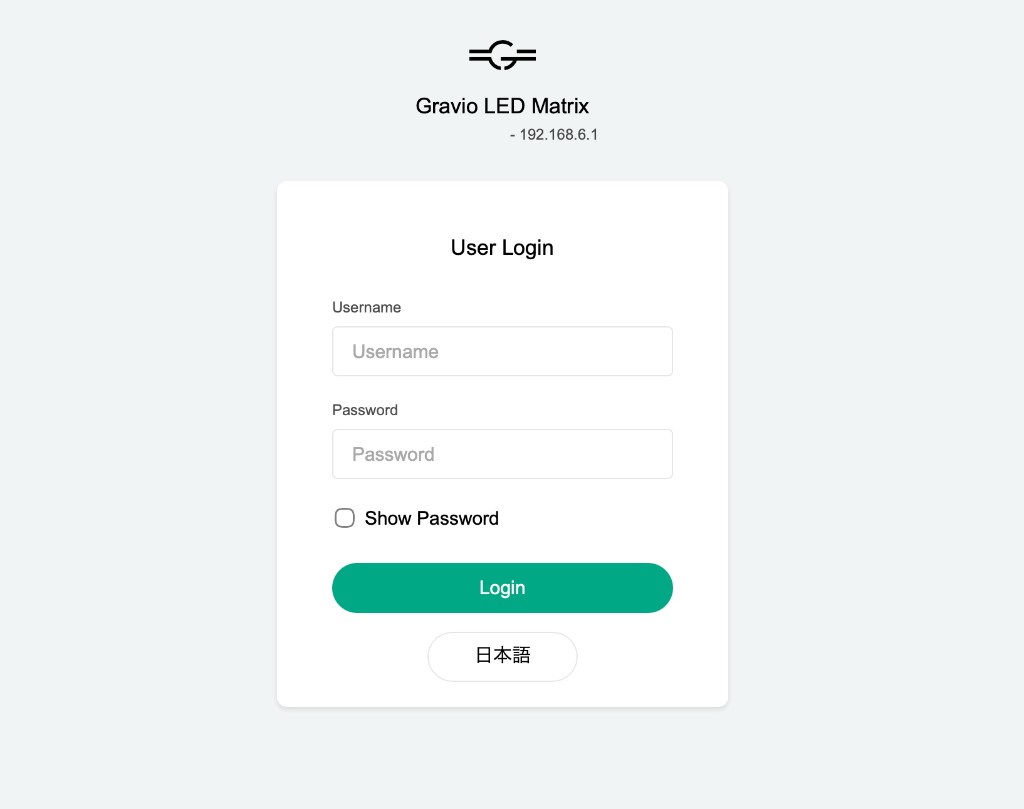
- After signing in, the device configuration page is displayed. Click
Configure WiFiand follow the on-screen instructions to set the SSID and password of your Wi-Fi network. The device reboots automatically after saving. - After reboot, the device connects to the configured Wi-Fi and the display shows the assigned IPv4 address.
- Open that IP address in a browser with port
8080(for example,http://<assigned IP>:8080). The same User Login screen appears. Sign in with the same default credentials as above to access the configuration page, then useConfig deviceto change MQTT broker settings, etc.
Default MQTT broker: A vendor-provided test broker is configured out of the box. For production use you must switch to the HubKit's built-in MQTT broker or your own broker.
1.3 Control Interfaces
The Gravio LED Matrix Gen2 can be controlled via either of the following interfaces. Use one or the other for a given device.
| Interface | Transport | Summary |
|---|---|---|
| MQTT | Wi-Fi to a broker | JSON / binary messages exchanged on matrix/<MAC>/... topics |
| HTTP | Direct HTTP requests on the LAN | JSON / binary payloads sent to endpoints under http://<device-ip>:8080 |
The JSON message format is identical between the two interfaces.
1.4 MQTT Protocol Specification
Topic Naming Convention
All topics follow the pattern matrix/<MAC>/..., where <MAC> is the 12-digit MAC address of the device (lowercase hex, no colons), for example aabbccddeeff.
| Direction | Topic | Purpose |
|---|---|---|
| Pub | matrix/<MAC>/status |
Device status notification (sent automatically at boot) |
| Sub | matrix/<MAC>/config/set |
Write configuration |
| Sub | matrix/<MAC>/config/get |
Request configuration |
| Sub | matrix/<MAC>/display/image/gif |
Display GIF image |
| Sub | matrix/<MAC>/display/image/bmp |
Display BMP image |
| Sub | matrix/<MAC>/display/text |
Display text |
| Sub | matrix/<MAC>/display/hybrid/on |
Enable hybrid mode |
| Sub | matrix/<MAC>/display/hybrid/off |
Disable hybrid mode |
| Sub | matrix/<MAC>/display/clear |
Clear the screen |
| Sub | matrix/<MAC>/reboot |
Reboot the device |
Message Payloads
Status notification (Pub) — matrix/<MAC>/status
{
  "device_id": "aabbccddeeff",
  "status": "online",
  "uptime": 3600,
  "wifi_signal": -65,
  "app_version": "1.0.2",
  "hw_version": "1.0.2"
}
Set configuration — matrix/<MAC>/config/set
{
  "brightness": 50,
  "rotation": 2
}
Get configuration — matrix/<MAC>/config/get
{}
Display text — matrix/<MAC>/display/text
{
  "text": "Hello World",
  "size": 1,
  "R": 100,
  "G": 0,
  "B": 0,
  "areaX": 0,
  "areaY": 16,
  "areaW": 32,
  "areaH": 16,
  "scrollSpeed": 100
}
| Property | Description |
|---|---|
text |
Text string to display |
size |
Font size |
R / G / B |
RGB color components (0–255) |
areaX / areaY |
Top-left coordinates of the display area (pixels) |
areaW / areaH |
Width and height of the display area (pixels) |
scrollSpeed |
Scroll speed (higher value = faster) |
Display GIF — matrix/<MAC>/display/image/gif
- Payload: GIF file (binary)
Display BMP — matrix/<MAC>/display/image/bmp
- Payload: BMP file (binary)
Enable / disable hybrid mode — matrix/<MAC>/display/hybrid/on / off
{}
Clear — matrix/<MAC>/display/clear
{}
Reboot — matrix/<MAC>/reboot
{}
1.5 HTTP API Specification
Base URL
http://<device-ip>:8080
Endpoints
| Method | Path | Description |
|---|---|---|
GET |
/status |
Get device status |
GET |
/config/get |
Get configuration |
POST |
/config/set |
Set configuration |
POST |
/display/text |
Display text |
POST |
/display/image/gif |
Display GIF image (binary) |
POST |
/display/image/bmp |
Display BMP image (binary) |
POST |
/display/clear |
Clear the screen |
POST |
/display/hybrid/on |
Enable hybrid mode |
POST |
/display/hybrid/off |
Disable hybrid mode |
POST |
/reboot |
Reboot |
The body of a POST request is either a JSON string or raw image binary data. The JSON schema is identical to the MQTT messages described in §1.4 MQTT Protocol Specification.
Quick Test
After confirming the device IP from the screen, you can quickly test text display using curl:
curl -X POST http://192.168.2.155:8080/display/text \
  -H "Content-Type: application/json" \
  -d '{"text":"Hello","size":1,"R":100,"G":0,"B":0,"areaX":0,"areaY":16,"areaW":32,"areaH":16,"scrollSpeed":100}'
1.6 Hybrid Mode (Layer Composition)
In hybrid mode, multiple display elements are layered on top of each other. For example, you can display a BMP image as the background with scrolling text on top.
Layers may be combined in any order or quantity (e.g. bmp → gif → bmp → bmp → text → text).
Procedure
- Send
display/clearto clear the screen - Send
display/hybrid/onto enable hybrid mode - Send
display/image/gif/display/image/bmp/display/textcommands in any order; each one is composed on top of the previous content - Once all desired content has been sent, optionally send
display/hybrid/offto leave hybrid mode
1.7 Using from Gravio HubKit
To control the device from a Gravio HubKit action flow, use the dedicated action components. The HTTP or MQTT connection method is selected via the component's ConnectionType property.
| Component | Purpose |
|---|---|
| Gravio Matrix Gen2 Display | Display text and images (GIF / BMP). Animated GIFs and custom display areas are supported |
| Gravio Matrix Gen2 Control | Clear, set brightness, or reboot |
| Gravio Matrix Gen2 Template | Show sensor templates such as Temperature, Humidity, Barometric Pressure, CO2, or Open/Close |
Using an MQTT Connection
- Create an MQTT Connection profile under Base Property Profiles, holding the broker URL, port, username, password, certificates, etc.
- In the action component, set
ConnectionTypetoMQTTand select the profile created above as the MQTT Connection base property. - Set the
DeviceIdproperty to the device's MAC address (12 hex digits, no colons). The MAC address can be found on the device's web configuration page.
Using an HTTP Connection
- Set the action component's
ConnectionTypetoHTTP. - Set the
IPAddressproperty to the device's IPv4 address (for example,192.168.6.1). The IP address is displayed on the device's screen after initial setup completes.
For a full description of every property, see the Gravio Action Reference.